


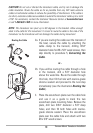
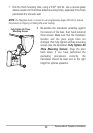
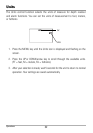

4. Fill the hull with enough water to submerge the transducer body. Use a
sand-filled bag or other heavy object to hold the transducer in position. The
transducer cannot transmit through air, and the water purges any air from
between the transducer and the hull, and fills any voids in the coarse
fiberglass surface.
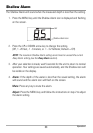
5. View the sonar signal on the display and compare against what was
observed in Step 2, making sure that the boat is in the same location as it
was during your observations in Step 2. If the results are comparable, move
on to Step 6. Otherwise, locate a new position in the hull and repeat Steps
3 through 5.
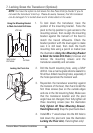
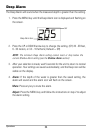
6. Run the boat at various speeds and water depths while observing the
screen on the depth sounder. If depth performance is required, test the
transducer in water at the desired depth. If the performance is acceptable,
move on to Step 7. If the performance is not acceptable, repeat Steps 3
through 6.
7. Once you have determined the best mounting location using the above
steps, mark the position of the transducer.
3. Routing the Cable
1. Once the mounting location is determined and you have marked the
position of the transducer, route the cable from the transducer to the depth
sounder.
CAUTION! Do not cut or shorten the transducer cable, and try not to damage the
cable insulation. Route the cable as far as possible from any VHF radio antenna
cables or tachometer cables to reduce the possibility of interference. If the cable is
too short, extension cables are available to extend the transducer cable up to a total
of 50' (15 m). For assistance, contact the Customer Resource Center at
humminbird.com or call 1-800-633-1468 for more information.
27
Inside the Hull Transducer Installation