


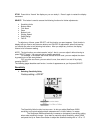

Installing the SeaScope ID600
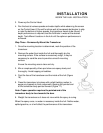
Before mounting the SeaScope ID600, gather the parts you need; SeaScope ID600, gimball
mounting bracket, mounting hardware kit, power cable, and transducer cable. If the transducer
cable is not long enough for your installation, see “Accessories” earlier in the manual for
information on the EC-6 10’ extension cable.
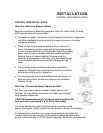
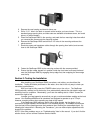
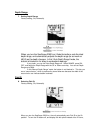
Next, consider where to mount the SeaScope ID600. The Gimbal mount allows you to
mount the unit on top of your boat console, or to hang the unit from an overhead structure. Or, by
removing the back of the SeaScope ID600, you can mount the unit flush in a console or bullhead,
by drilling a standard 3-1/2” gauge opening. To choose the best location, consider the following.
• The mounting surface should be adequately supported to protect the SeaScope ID600
from excess wave shock and vibration.
• The mounting area should allow at least 2” clearance at back, sides, and top of the unit
for connection, air flow, and ease of removal.
• Any VHF radio you have may incur some degree of interference with the depth sounder.
SeaRanger depth sounders are designed to minimize this interference, although it is best
to route the transducer cable and antenna cable as far away from each other as possible,
for example, on opposite sides of the boat.
After you have determined the best location for your SeaScope ID600, proceed with the
instructions on the following page.
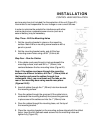
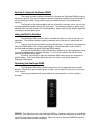
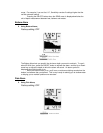
After installing the transducer, connect the power cable to a 12 VDC power source. It is best
to wire the SeaScope ID600 through your boat’s fuse panel, using a 1-amp fuse and fuse holder
(not included) in the positive wire, as shown on the following illustration. Do not connect
directly to the battery without a fuse. Attach the black lead to the negative (-) terminal, and
wire the red lead through the fuse to the positive (+) terminal. Route the power and transducer
cables to the area you intend to mount the unit, and proceed with the instruction applicable to the
mounting option you have chosen.
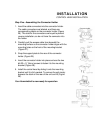
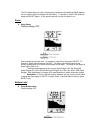
Gimbal Mount Installation
1. Set the gimbal bracket on the mounting surface.
2. Mark 1/8” holes for the four mounting screws.
3. At least 3” behind the bracket, mark a 5/8” hole to run the cables through.
4. Set the gimbal mount aside and drill the holes as marked.
5. Mount the bracket, using the mounting hardware supplied with you SeaScope ID600.
6. Pull the transducer and power cables up through the 5/8” hole behind the gimbal brachet,
and connect them to the back of the SeaScope ID600.
7. Mount the unit on the Gimball and tighten the knobs.
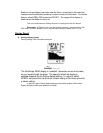
Flush Mount Installation
1. Remove the bezel of the SeaScope ID600 by gently prying with a coin or scre-driver in
the slot on the bottom side.
2. Remove the four Phillips-head screws in the corners of the clear plastic lens.