C. Intermediate Pressure Test
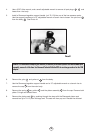
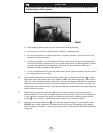
1. Attach any Sherwood second stage to one of the low pressure ports, and the Sherwood
intermediate pressure gauge (p/n TL119) to another low pressure port. Plug all other ports with
appropriate port plugs.
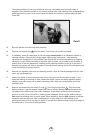
2. Attach the regulator to a tank valve giving a source pressure of between 2700 and 3500 psig
(186-240 Bar).
3. Turn the supply air on
slowly while listening for any unusual air leaks. If any are heard, turn the
air off immediately and determine the source of the leak. If no leaks are found, watch the
pressure gauge reading rise as you continue turning the air on
slowly. It should stop around
145 psig ( 10 bar).
4. If the pressure gauge continues to rise above 155 psig (10.4 bar), turn the air supply off
immediately and inspect the regulator to determine the cause.
5. Once the air pressure stops rising, the internal parts should be worked into place by allowing
air to escape from the second stage several times by pushing the purge button.
6. If you have depressed the purge button several times and the pressure is below 135 psig
(9.3 bar), you can add shims to increase the pressure.
Do not use more than three shims.
7. If the pressure is too high, above 150 psig ( 10.3 bar), remove the necessary shims.
8. After the correct pressure has been reached, let the regulator sit for several minutes and then
depress the purge button again to check that the regulator returns to the proper pressure.
Never set the output pressure of the first stage above 150 psig (10.3 bar).
11
20
NOTE
: This test determines the regulator’s lock-up pressure (the pressure put out by the first stage during
a no-flow condition).


