


1
INTRODUCTION
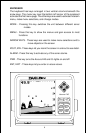
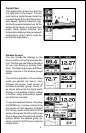
The Accura 240 is the latest member of the Eagle family that combines a
high performance sonar with a wide, high definition screen. Using menu
features and “soft-key” operation, the Accura 240 is also easy to use. The
wide screen shows the underwater world with high resolution and detail.
The display and keyboard are also lighted for night operation. The Accura
240 has digital boat speed, surface water temperature, and distance
travelled (log) screens.
SPECIFICATIONS
Dimensions................................................ 4.94"H x 6.10"W x 2.71"D
Transmitter Frequency .............................. 192 kHz
Transmitter Power ..................................... 600 watts (p-p, typical)
75 watts (RMS, typical)
Display ...................................................... Film Supertwist LCD
240 vertical x 240 horizontal
57,600 total pixels
NOTICE!
The storage temperature for your unit is from -4 degrees to +167
degrees Fahrenheit (-20 degrees to +75 degrees Celsius). Extended
storage in temperatures higher or lower than specified will damage the
liquid crystal display in your unit. This type of damage is not covered
by the warranty. For more information, contact the factory's Customer
Service Department or your local service center.
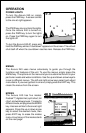
INSTALLATION
MOUNTING
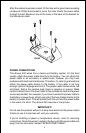
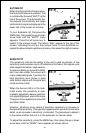
Install the Accura 240 in any convenient location, provided there is
clearance behind the unit when it is tilted for the best viewing angle. Holes
in the bracket base allow wood screw or through-bolt mounting. You may
need to place a piece of plywood on the back of thin fiberglass panels to
secure the mounting hardware. Make certain there is enough room behind
the unit to attach the power and transducer cables.
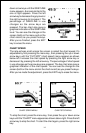
The Accura 240's gimbal bracket will also accept the GBSA-1 swivel
bracket adapter that lets you rotate the unit a full 360°.
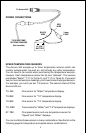
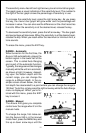
The smallest hole that allows one power or transducer connector to pass
through is 3/4". After the hole is drilled, push the transducer connector up
through the hole first, then drop the power cable down through it.