DANIEL MODEL 788DVC DIGITAL CONTROL VALVES DEC 2012
TM
DISASSEMBLY AND REASSEMBLY 5-1
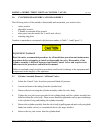
5.0 CYLINDER DISASSEMBLY AND REASSEMBLY
The following tools will be needed to disassemble and reassemble your control valve:
• socket wrench
• adjustable wrench
• T-handle or extended Allen wrench
• arbor press (may be needed for 4- and 6-inch valves)
• retaining ring pliers
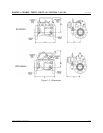
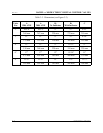
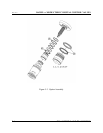
Numbers in parentheses correspond with the item numbers in Table 7-1 and Figure 7-1.
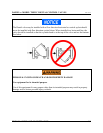
EQUIPMENT DAMAGE
Read the entire recommended procedure for all installation operations and maintenance
procedures before attempting to install or disassemble the valve. Disassembly of this
cylinder assembly is different from previous Daniel Control Valves and requires strict
adherence to the procedures outlined in this manual.
Failure to read and comply with these procedures could result in damage to the equipment and
compromise in the integrity of the operation.
5.1 Cylinder Assembly Removal - All Daniel Valves
1. Isolate the Control Valve from the system and bleed off pressure.
2. Loosen and remove the tubing from the cylinder head.
3. Remove the nuts securing the cylinder assembly within the valve body.
4. Tighten the two jack screws provided in the cylinder head until the cylinder assembly has
been freed from the valve body. These screws should be tightened evenly to prevent damage
to the cylinder O-ring and binding the cylinder assembly.
5. Remove the cylinder assembly from the valve body by pulling upward and evenly using both
hands (on smaller valves) or a mechanical device (for larger models).
6. Remove the two jack screws from the cylinder head.


