13
2.23 Watchman
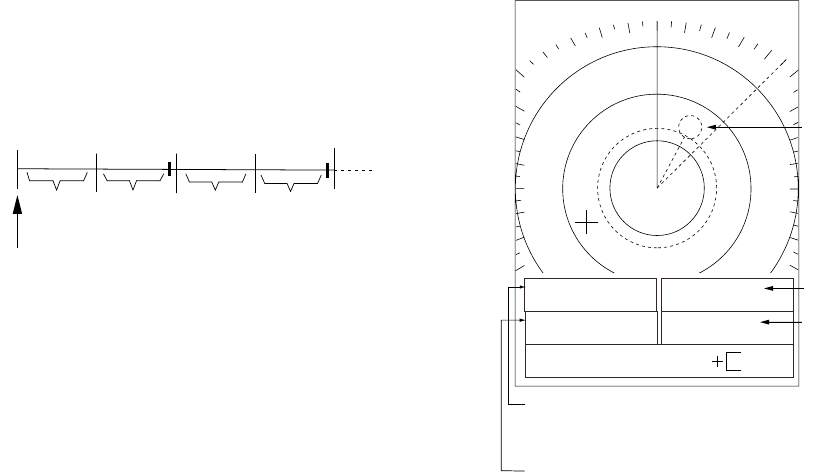
The watchman function periodically transmits
the radar for about one minute to check for
targets in the guard zone. If a target has
entered or exited the guard zone the aural
alarm sounds, watchman is canceled and the
radar starts transmitting. This feature is useful
when you do not need to observe the radar
continuously but want to be alerted to radar
targets in the guard zone. When the radar starts
transmitting, the buzzer sounds to alert the
operator.
St-by
5, 10 or
20 min
Tx
1 min
Tx
1 min
St-by
5, 10 or
20 min
Watchman
starts.
* Timer appears and countdowns
time to Tx when 1:00 remains
in ST-BY.
*
*
Figure 2-22 How watchman works
Turning watchman on/off
1. Set a guard zone. (See “Setting a guard
zone” on page 11.)
2. Press the [MENU] key to open the menu.
3. Select WATCHMAN.
4. Select transmitting interval or turn watchman
off. .
5. Press the [MENU] key to register your
selection and close the menu.
"WATCHMAN" appears at the top left-hand
corner on the screen when watchman is active.
Note: If no guard zone is set, the buzzer
sounds when the radar starts transmitting.
Canceling watchman
Press any key at any time. If done while
transmitting, watchman is disabled and the
normal display appears. In stand-by, the timer
appears and counts down from one minute, and
then the radar goes into stand-by.
2.24 Navigation Data
With navigation data input in NMEA 0183
format (IEC 61162-1), navigation data can be
displayed at the screen bottom.
Navigation data includes position, course,
speed, and range and bearing to destination
waypoint (if set on navaid).
6.0
NM
2.0
WP
LL
17.0°
M
2.6
NM
34° 38.99'
N
135° 19.22'
E
CSE
18.0°
M
*
SPD
4 .3
KT
Course
EBL
VRM
45.0°
2.42
NM
255.0°
3.35
NM
Speed
Bearing and range to waypoint
*- Bearing suffixed with M
(Magnetic bearing) or T (True bearing).
Own ship position
Waypoint
mark
*
Figure 2-23 Sample navigation data display
Note 1: External sensor must be capable of
outputting such data to show it on this radar.
Note 2: A location shows three bars (- - -) when
there is no corresponding data.
Note 3: To receive data from multiple
equipment, all data must be combined into one
data line by a data-mixing device.
Note 4: Magnetic and true bearing may be
selected alternately by pressing and holding
down the [GAIN] key.
Turning on the navigation data display
1. Press the [MENU] key to open the menu.
2. Select NAV DATA.
3. Select ON.
4. Press the [MENU] key to conclude.
