


Fishfinder 90/140 Owner’s Manual 7
INSTALLING YOUR FISHFINDER > INSTALLING THE TRANSDUCER
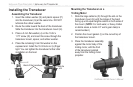
4. Wrap the two ends of the cable tie around the motor
body. Place the pointed end of the cable tie through
the fastener hole on the opposite end and pull it
through until it is snug but not tight. (The cable tie
clicks when you pull it.)
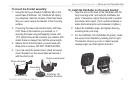
5. Position the transducer so that it is parallel with the
bottom when in use, and make sure the gasket is
aligned properly. Pull the cable tie end until tight.
Trim off the excess, if necessary. Tighten the 10-32
locking nut until it touches the mounting bracket and
then tighten 1/4 turn more. (Do not overtighten.)
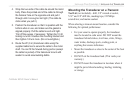
6. Route the 20’ (6 m) transducer cable using the
supplied cable ties to secure the cable to the motor
shaft. You can fill the forward-facing portion (except
the cable tie pocket) of the transducer mount with
sealant to avoid accumulating debris.
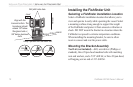
Mounting the Transducer on a Transom
Tool List (not included)—drill, 3/8" wrench or socket,
5/32" and 1/8" drill bits, masking tape, #2 Phillips
screwdriver, and marine sealant.
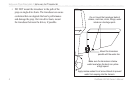
When selecting a transom mount location, consider the
following for optimal performance:
• For your sonar to operate properly, the transducer
must be located in calm water. DO NOT mount the
transducer behind strakes, rivet lines, struts, fittings,
water intake, discharge ports, eroding paint, or
anything that creates turbulence.
• Mount the transducer as close to the center of the boat
as possible.
• DO NOT cut the transducer lead. (This voids your
warranty.)
• DO NOT mount the transducer in locations where it
might be jarred when launching, hauling, trailering,
or storage.