


8 307985
Operation
Pressure Relief Procedure
WARNING
PRESSURIZED EQUIPMENT HAZARD
The system pressure must be manually relieved to
prevent the system from starting or spraying acci-
dentally. To reduce the risk of an injury from acci-
dental spray from the gun, splashing fluid, or
moving parts, follow the Pressure Relief Proce-
dure whenever you:
D are instructed to relieve the pressure,
D stop spraying,
D check or service any of the system equipment,
D or install or clean the spray nozzle.
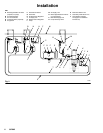
1. Shut off the air supply to the pump.
2. Close the bleed-type master air valve (A, required
in your system).
3. Hold a metal part of the gun firmly to the side of a
grounded metal pail, and trigger the gun to relieve
pressure.
4. Open the drain valve (D, required in your system),
having a container ready to catch the drainage.
5. Leave the drain valve open until you are ready to
spray again.
If you suspect that the spray nozzle or hose is com-
pletely clogged, or that pressure has not been fully
relieved after following the steps above, very slowly
loosen the nozzle retaining ring or hose end coupling
and relieve pressure gradually, then loosen completely.
Now clear the nozzle or hose.
Packing Nut
WARNING
To reduce the risk of serious injury whenever you
are instructed to relieve pressure, always follow the
Pressure Relief Procedure above.
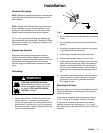
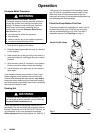
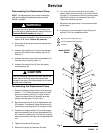
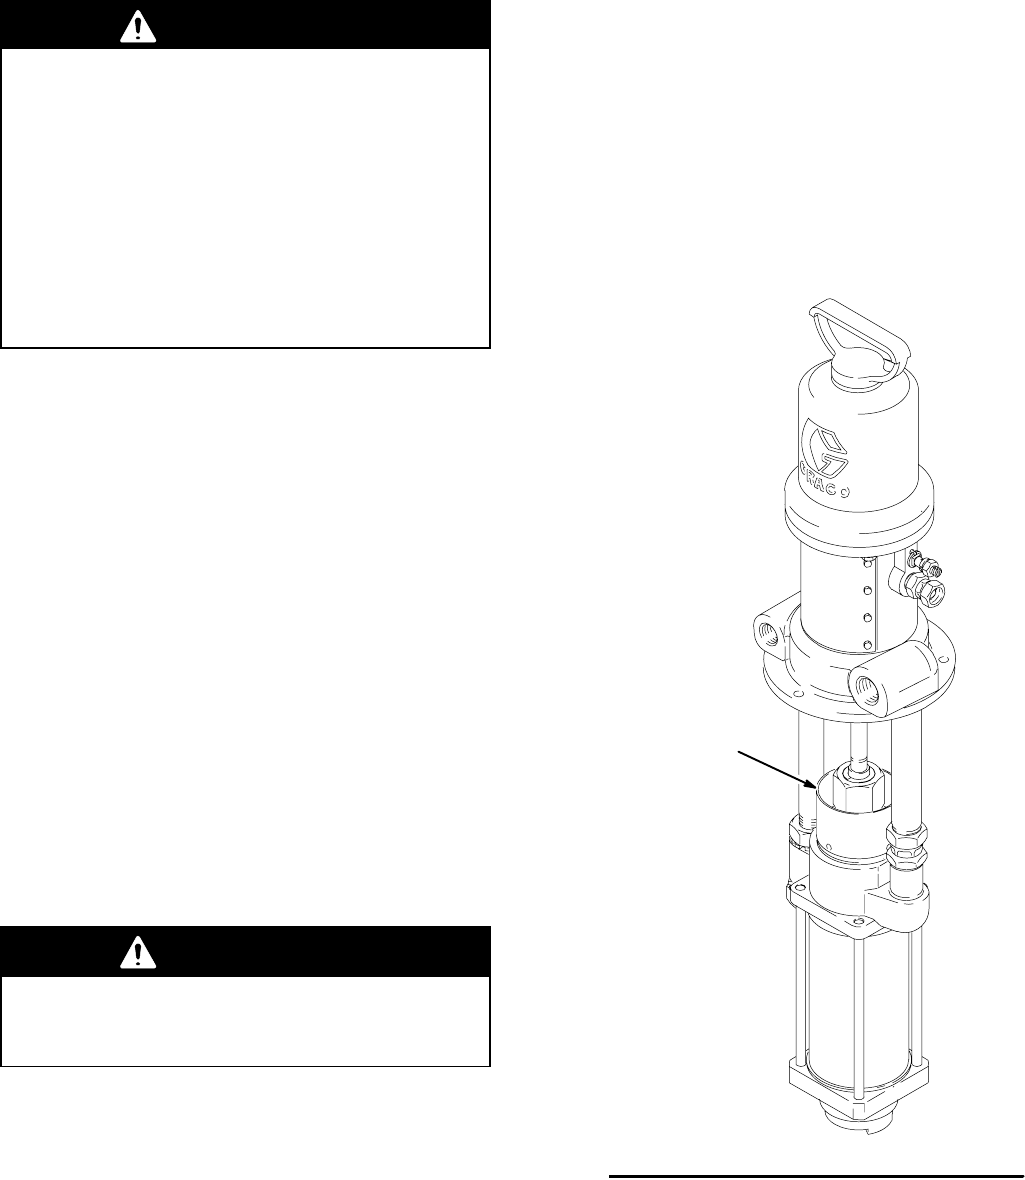
Check the tightness of the packing nut/wet-cup (U)
periodically. The nut should be tight enough to prevent
leakage. Torque the nut to 20–24 ft-lb (27–33 N.m); do
not overtighten or you may damage the packings.
Relieve pressure before adjusting the nut. See Fig. 3.
If the pump is not immersed, fill the packing nut/wet-
cup 1/2 full with a compatible solvent. Keep the cup
filled at all times to help prevent the fluid you are
pumping from drying on the exposed displacement rod
and damaging the throat packings.
Flush the Pump Before First Use
The pump is tested with lightweight oil, which is left in
to protect the pump parts. If the fluid you are using
may be contaminated by the oil, flush it out with a
compatible solvent. See Flushing on page 11.
06085
Fig. 3
U
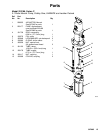
Model 223186 Shown