


9
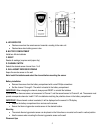
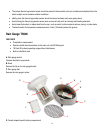
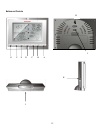
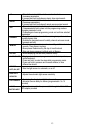
H. BATTERY COVER
Secures battery compartment on the anemometer base
Assembly
• Slide the wind cups on to the anemometer rotating shaft. Do not use force.
• Insert the longer arm of the Allen Wrench (provided) into the wind cup set screw opening. Feel the head of the set
screw inside the wind cups and tighten carefully the set screw securing the wind cups to the rotating shaft.
• Test to ensure cups are securely fastened to the shaft and cannot be removed
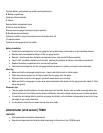
Battery installation
• Remove four (4) screws from the battery compartment with a small Phillips screwdriver.
• Open the battery compartment and install 2 “AA” size alkaline batteries (not included) matching the polarities shown.
• Do not close battery compartment yet as you need to make sure that the anemometer sends the signal to the main
unit (0.0 mph will appear on the main unit’s wind window if the signal was sent and received successfully)
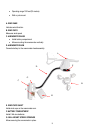
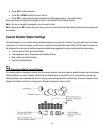
Aligning
This procedure must be performed after main unit has been powered and all remote weather sensors were received
successfully.
• Manually point the wind direction vane to the north (use a compass or map if necessary).
• Press the “SET” button located inside battery compartment (on the shorter side) with a paper clip. “SET” button selects
a new direction for NORTH and, when pressed repeatedly, alternates between the factory default NORTH and user
selected NORTH.
• Watch for the next anemometer data transmission in the main unit’s wind window – the direction will be updated
• Replace the battery compartment door and secure the screws.
Note: Repeat this procedure every time after changing the batteries.
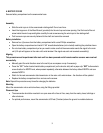
Mounting
Mount the anemometer onto a vertical surface, using the fittings provided.
Placement tips:
• The anemometer should be mounted in an open area with a free air flow; away from the nearby trees, buildings or
other structures.
• For optimal performance, mount the anemometer at 33 feet (10meters) above the ground in unobstructed area.