


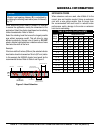
PAGE 20 — CV SERIES VIBRATOR MOTOR • OPERATION AND PARTS MANUAL — REV. #0 (04/30/13)
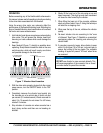
MAINTENANCE
DRIVE MOTOR MAINTENANCE
1. Visually inspect the motor daily before use for defective
or missing parts, and have repairs made before use.
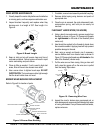
2. Inspect brushes frequently and replace when they
become worn to a length of 3/8". See Length A in
Figure 8.
Figure 8. Brush Length
3. Keep air inlet and air exit louvers clean and free of
concrete and debris. Failure to do so will result in rapid
motor overheating and parts failure.
4. Clean air filter as needed. If unit is used in high dust
areas, filter will have to be cleaned more often.
5. Use a screw driver to tighten brush caps. DO NOT
OVERTIGHTEN. The brush cap must be tight enough
that the brush holder does not move.'
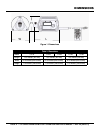
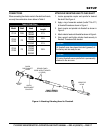
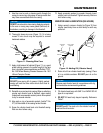
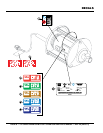
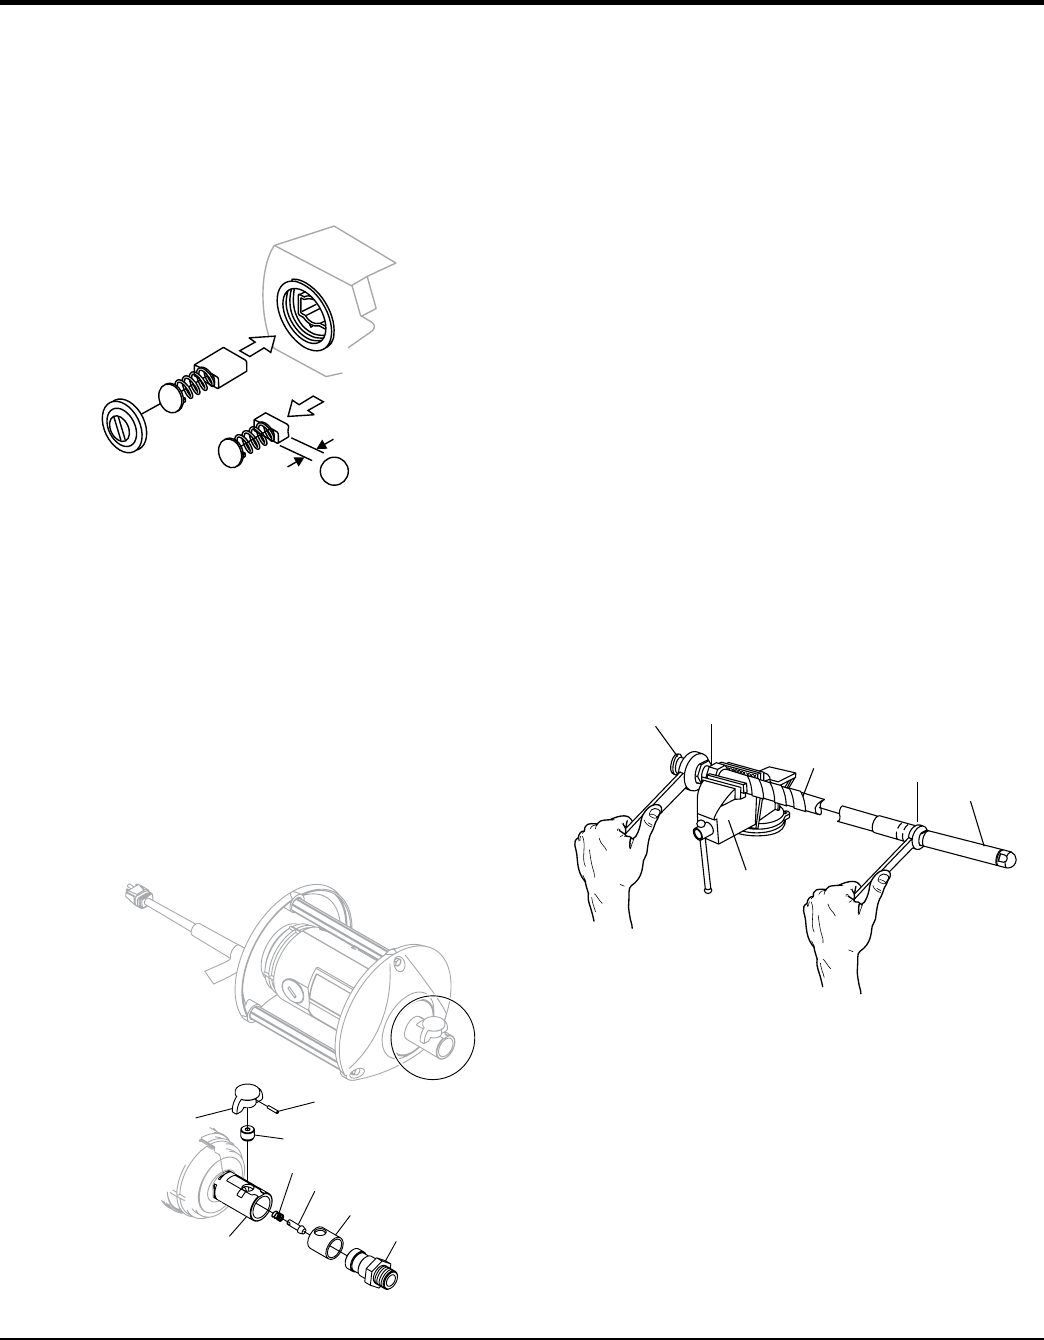
BRONZE WEAR BUSHING REPLACEMENT
Refer to Figure 9 for location of parts.
Figure 9. Bronze Wear Bushing
A
SLOTTED SPRING PIN
QUICK-DISCONNECT KNOB
SPRING HOUSING
OUTPUT ENDBELLSHAFT
LOCK PIN
SHAFT COUPLING
BRONZE WEAR BUSHING
COMPRESSION SPRING
1. If installed, remove head assembly and shaft coupling.
2. Remove slotted spring using hammer and punch of
appropriate size.
3. Once the pin is removed, the quick-disconnect knob,
compression spring, and lock pin can easily be
removed.
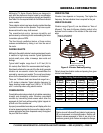
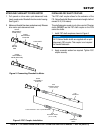
FLEXSHAFT LUBRICATION (100 HOURS)
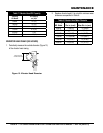
4. Using a bench vice and wrench, remove coupler from
flexshaft as shown in Figure 10. Please note threads
are right-handed on this side of the flexshaft (drive
motor end).
5. Heat should be applied to the threads to break down
the anaerobic sealant. Applying heat will help prevent
possible damage to threads.
6. Next, using a wrench and bench vise if necessary,
remove flexible shaft from vibrator head as shown in
Figure 10. Please note threads are left-handed on this
side of the flexshaft (vibrator end).
7. Pull the wire core out from casing. Using a clean soft
cloth, wipe the grease off as the wire core is pulled
from the casing. Wipe clean.
Figure 10. Removing Wire Core
8. Inspect the core for broken wires, permanent set, or
other damage such as an area that indicates high wear
or having overheated. If any of these conditions exists,
replace wire core.
VIBRATOR
HEAD
LEFT-HAND
THREAD
RIGHT-HAND
THREAD
BENCH
VISE
APPLY
HEAT
FLEXSHAFT
APPLY
HEAT
COUPLER