


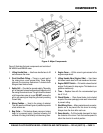

PAGE 16 — WM45H/E PLASTER/MORTAR MIXER • OPERATION AND PARTS MANUAL — REV. #0 (09/27/12)
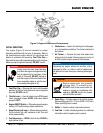
PRE-INSPECTION (ENGINE/MIXER)
BEFORE STARTING
1. Read safety instructions at the
beginning of manual.
2. Clean the mixer, removing dirt and
dust, particularly the engine cooling
air inlet, carburetor and air cleaner.
3. Check the air filter for dirt and dust. If air filter is dirty,
replace air filter with a new one as required.
4. Check carburetor for external dirt and dust. Clean with
dry compressed air.
5. Check fastening nuts and bolts for tightness.
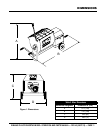
Engine Oil Check
1. To check the engine oil level, place the mixer on secure
level ground with the engine stopped.
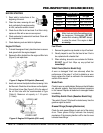
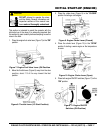
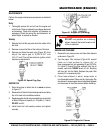
2. Remove the filler dipstick from the engine oil filler hole
(Figure 5) and wipe clean.
Figure 5. Engine Oil Dipstick (Removal)
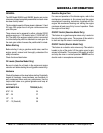
3. Insert and remove the dipstick without screwing it into
the filler neck. Check the oil level shown on the dipstick.
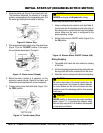
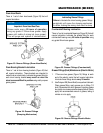
4. If the oil level is low (See Figure 6), fill to the edge of
the oil filler hole with the recommended oil type
(Table 6). Maximum oil capacity is 1.16 quarts
(1.1 liters).
Figure 6. Engine Oil Dipstick (Oil Level)
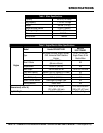
Table 6. Oil Type
Season Temperature Oil Type
Summer 25°C or Higher SAE 10W-30
Spring/Fall 25°C~10°C SAE 10W-30/20
Winter 0°C or Lower SAE 10W-10
DANGER
Motor fuels are highly flammable and can
be dangerous if mishandled. DO NOT
smoke while refueling. DO NOT attempt
to refuel the mixer if the engine is hot!
or running.
Fuel Check
1. Remove the gasoline cap located on top of fuel tank.
2. Visually inspect to see if the fuel level is low. If fuel is
low, replenish with unleaded fuel
.
3. When refueling, be sure to use a strainer for filtration.
DO NOT top-off fuel. Wipe up any spilled fuel
immediately!
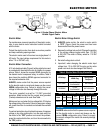
V-Belt Check (Electric Model Only)
A worn or damaged V-belt can adversely affect the
performance of the mixer. If a V-belt is defective or worn
simply replace the V-belt as outlined in the maintenance
section of this manual.
Blade Check
Check for worn or paddle blades. Make sure that all blades
are adjusted properly. See blade adjustment procedure
in this manual. Replace all defective or damaged blades
immediately.
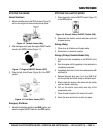
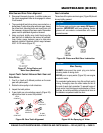
Start/Stop Switch Check (Gasoline Model Only)
This switch (Figure 11B) should be tested every time the
gasoline engine is started.
Grease Fittings (Dumping Mechanism)
Check the zerk grease fittings at each end of the mixing
drum. These grease fittings lubricate the dumping
mechanism. If the dumping handle is stiff or hard to move
lubricate these fittings.