


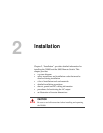


Installation
2–6 975-0054-01-01
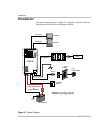
Installing the XS400
Overview
This chapter provides detailed information on installing the XS400. The
overall procedure is divided into twelve steps:
1. Designing your installation (page 2–6)
2. Mounting your inverter (page 2–10)
3. Connecting the chassis ground (page 2–11)
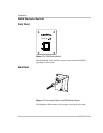
4. Installing the S400 Remote Switch
(page 2–12)
5. Getting ready to connect the DC cables (page 2–14)
6. Routing the DC cables (page 2–15)
7. Connecting the DC cables (page 2–16)
8. Connecting your appliances to the GFCI outlets (page 2–18)
9. Hardwiring the AC output (page 2–19)
10. Performing checks prior to initial start-up (page 2–22)
11. Connecting the AC input cord (page 2–22)
12. Testing your installation (page 2–23)
Step 1: Designing Your Installation
Before doing anything else, you need to determine how you are going to
use your XS400, and then design a power system that will give you
maximum performance. The more thorough your planning, the better
your power needs will be met. In particular, you will need to:
• Be aware of installation codes
• Choose an appropriate location
• Calculate your battery requirements and appropriate battery size
• Calculate the DC cable size
• Select the correct DC fuse and Disconnect or the DC circuit breaker
Installation Codes
See “Installation Codes” on page 2–3 for more information.