


Installation
2–14 975-0054-01-01
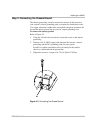
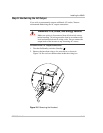
Step 5: Getting Ready to Connect the DC Cables
The DC cables should be as short as possible and large enough to handle
the required current, in accordance with the electrical codes or regulations
applicable to your installation. The minimum recommended DC cable
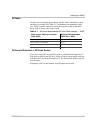
size is specified in Table 2-1 on page 2–9. For the recommended DC fuse
and Disconnect or DC circuit breaker, see page 2–9.
To prepare the DC cables:
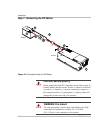
Refer to Figure 2-5, “Connection Order for DC Cables” on page 2–16.
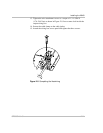
1. Cut the negative cable to the recommended length. (See Table 2-1 on
page 2–9 for DC cable size.) Strip off enough insulation so you can
install the terminal you will be using.
Xantrex recommends the use of crimp connectors such as a ring lug
type. The connector should be designed for a 6 mm or 1/4 inch stud
size to connect to the XS400 Sine Wave Inverter. If a crimp connector
is used, it should be crimped using the tool indicated by the connector
manufacturer.
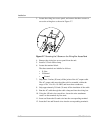
2. Cut two lengths of positive cable. One cable (maximum 18 inches)
goes from the battery to the DC fuse and Disconnect or to the DC
circuit breaker. The other cable goes from the DC fuse and
Disconnect or to the DC circuit breaker to the positive DC terminal.
3. Attach the connectors to the ends of both cables. Make sure no stray
wire strands protrude from the terminals.