Scanning |
243
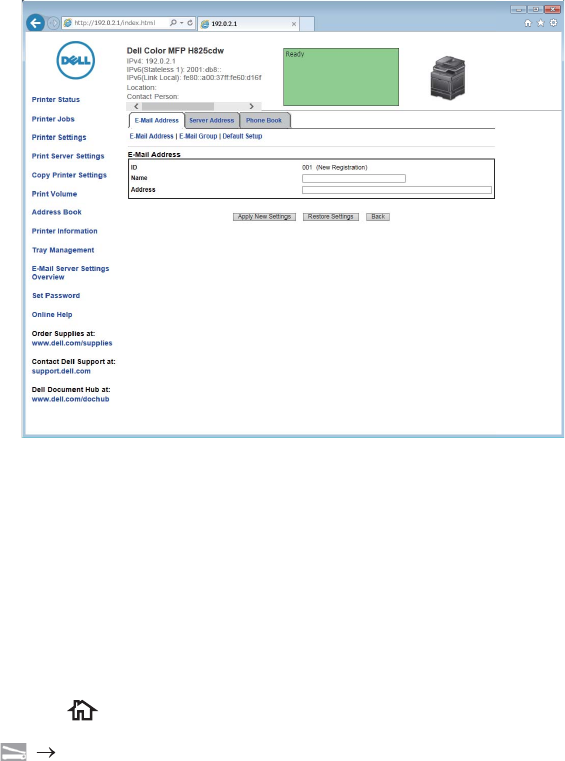
The E-Mail Address page for registering a new e-mail address appears.
3 Enter the following:
• Name
• Address
4 Click Apply New Settings.
Sending an E-mail With the Scanned Data
1 Press the (Home) button.
2 Tap Scan to Email.
3 Specify a recipient by either of the following:
• If you want to enter an e-mail address directly:
a Tap the Enter Recipient's Address text box.
b Enter the address using the keyboard.
c Tap Done.
You can remove or edit the recipient by tapping + and the recipient you specified.
• If you want to select from the following types of address books:
a Tap Address Book.
b Select a recipient from either of the following:
– Tap Individuals to select an e-mail address registered in the address
book.
– Tap Groups to select a group of e-mails registered in the address book.
– Tap Network Address Book to search an e-mail address from the LDAP
server address book.
See "Sending an E-mail With the Scanned Data Using the E-mail Server
Address Book."
c Tap Done.


