English
Recording settings
47 How to set
1
Display the <RECORDING CONDITIONS SET>
screen as explained in "Displaying the recording
settings screen" (P39).
2
Turn the J-dial to select "OVERWRITE" for the
normal or the alarm recording area, and then turn
the S-dial clockwise.
3
Turn the J-dial, select "OFF", and turn the S-dial
clockwise.
The "REMAINING DISK WARNING" changes from
"**" to "1%", and disk overwrite is prohibited.
If the available capacity in the normal or alarm
recording area drops below 1%, the corresponding
FULL indicator on the front panel of the DVR will start
blinking.
4
Changing the "REMAINING DISK WARNING" level
1 Turn the J-dial to select "REMAINING DISK
WARNING", and then turn the S-dial clockwise.
2 Turn the J-dial to select remaining level
(example: 5%), and then turn the S-dial
clockwise.
The cursor moves to "SERIES RECORDING".
Selections: 1%, 2%, ... 9%, 10%
5
Press the EXIT/OSD button to end the setting
procedure.
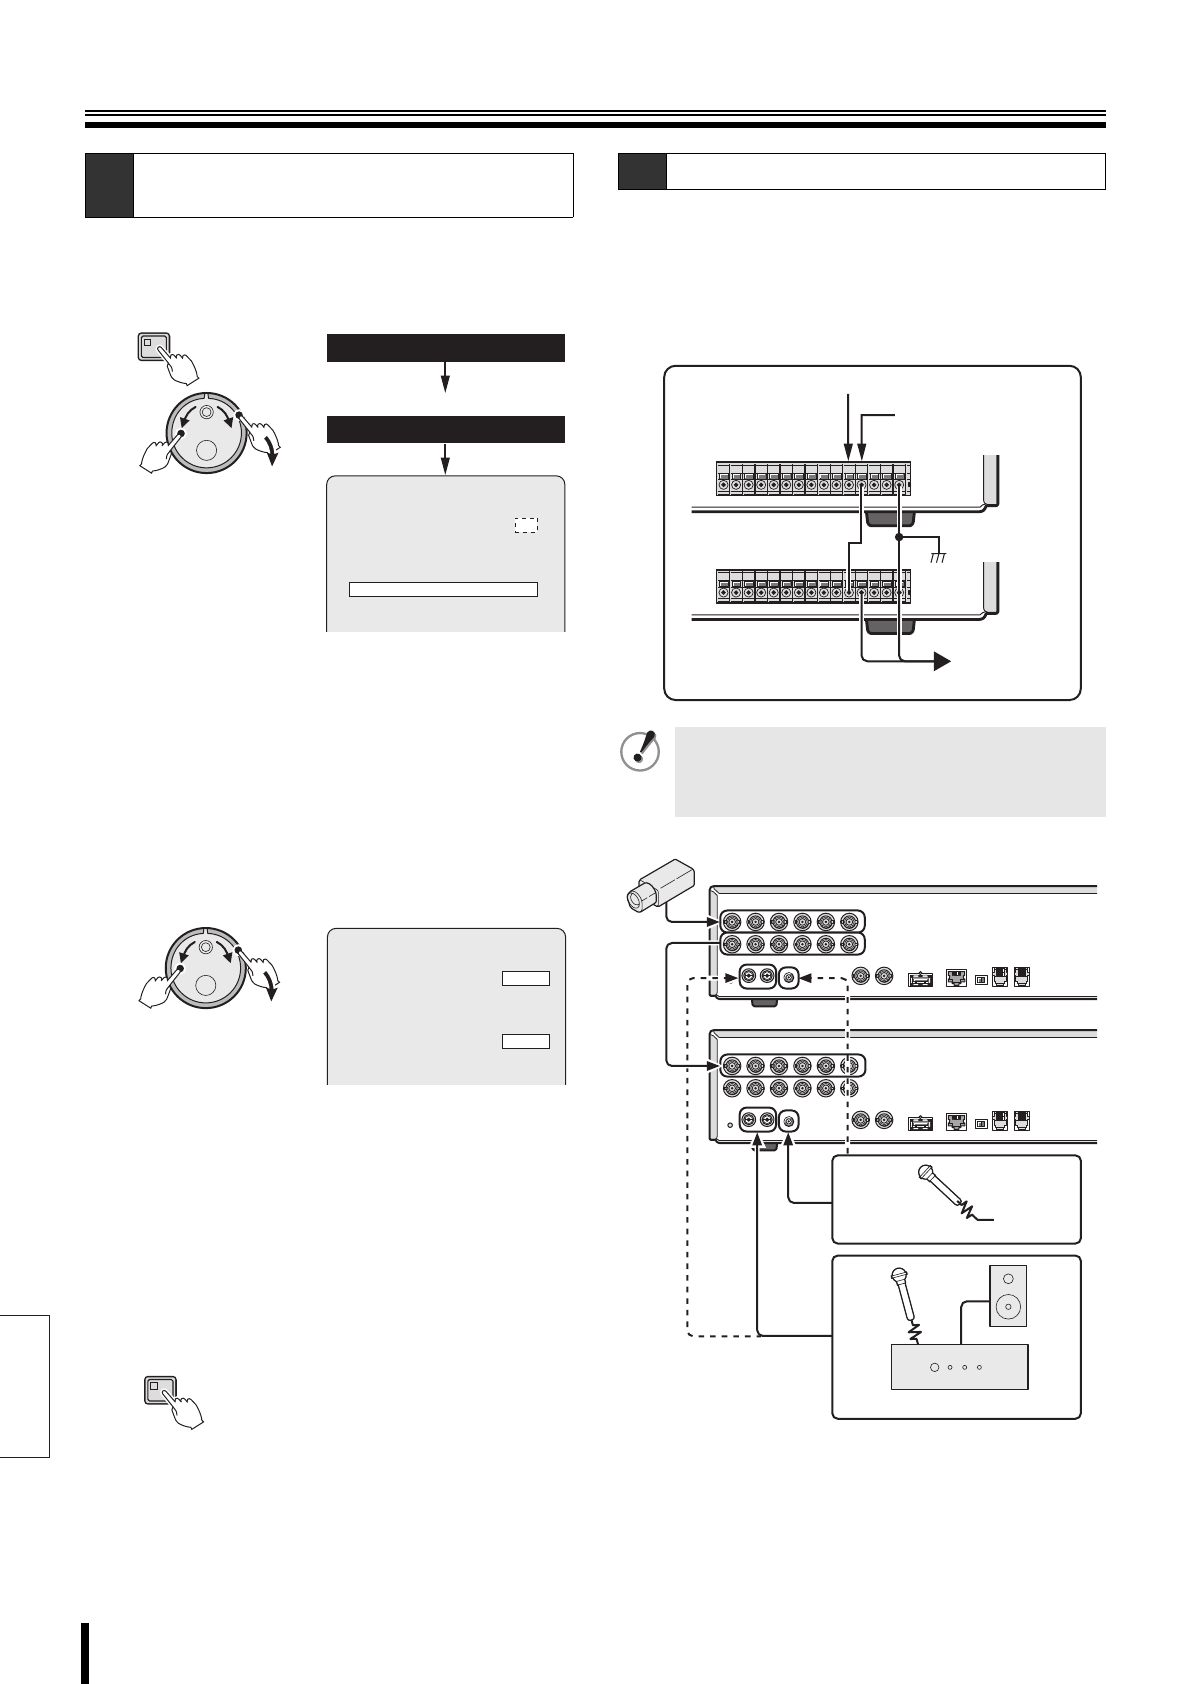
If multiple DVR units are connected, recording can be
automatically continued on the next DVR when the
recording area of the first one becomes full.
1
Connect the SERIES OUT terminal of the CONTROL
terminal block on the rear panel of the first DVR to
the SERIES IN terminal of the next DVR.
C-1
Overwrite setting for the recording
areas
MENU
(J)
(S)
<RECORDING CONDITIONS SET>
NORMAL RECORDING AREA
OVERWRITE : ON
ALARM RECORDING AREA
OVERWRITE : ON
RECORDING DISK WARNING : **
SERIES RECORDING : ON
AUTO DELETE : OFF
3.RECORDING CONDITIONS SET
2.RECORD SET
<MAIN MENU>
<RECORD SET>
(J)
(S)
NORMAL RECORDING AREA
OVERWRITE : OFF
ALARM RECORDING AREA
OVERWRITE : OFF
REMAINING DISK WARNING : 1%
SERIES RECORDING : ON
AUTO DELETE : OFF
<RECORDING CONDITIONS SET>
EXIT/OSD
C-2 Setting series recording
• Use cables no longer than 3m between the DVR units
for serial connection.
• Connect the MIC terminal and the AUDIO terminal as
shown below.
SERIES IN
SERIES OUT
(First DVR unit)
(Second DVR unit)
(Third DVR and
more)
Microphone (sold separately)
Amplifier (sold separately)
