


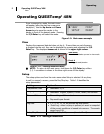
Sensor Alignment
RH Sensor Alignment
16
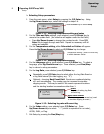
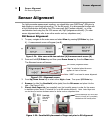
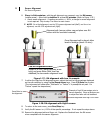
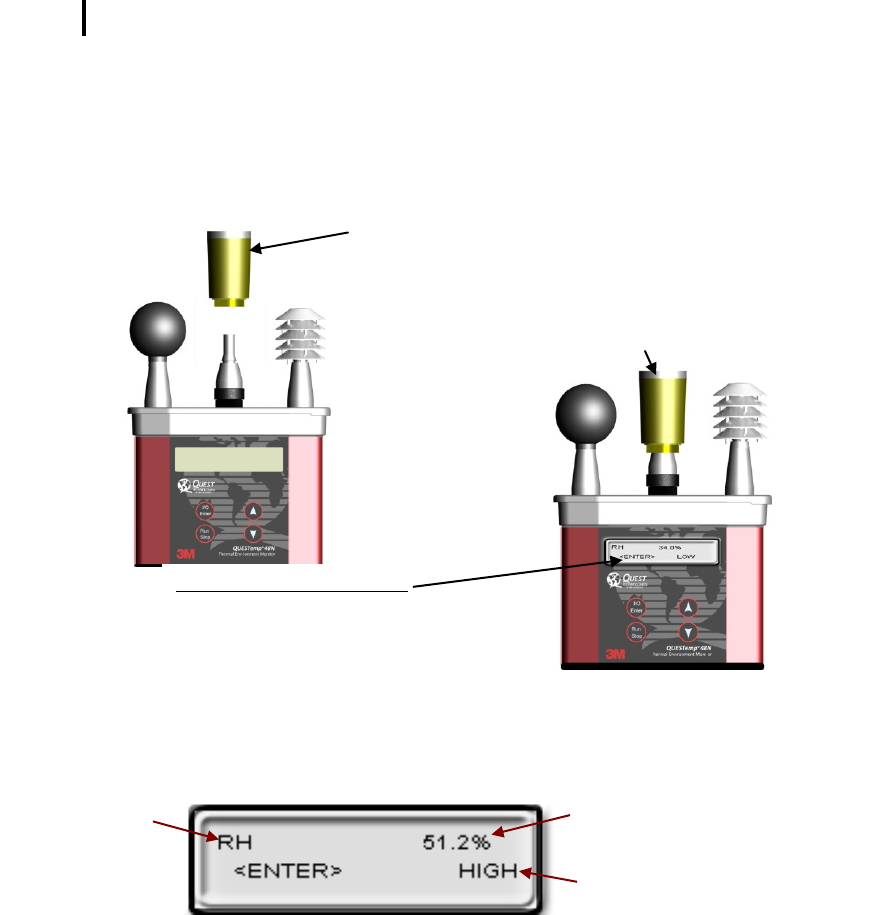
6. Place the Salt container, with the salt alignment cap removed, over the RH sensor
(middle sensor). Allow level to stabilize for at least 15 minutes. (Refer to Figure 1-25.)
About sensor alignment: if readings are within +/-0.5%, a change in sensor alignment
is not required. Skip to step 7 to return to main menu.
NOTE: For a High alignment, use the 75% sensor alignment salt (NaCL) and for a Low
alignment, use the 33% alignment salt (MgCl).
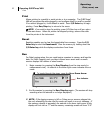
Figure 1-27: RH alignment with Low % example
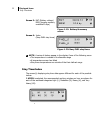
7. In either the High/Low RH alignment screen, adjust the level to the percentage displayed
on the salt container by using the Up/Down Arrow keys. Press I/O Enter key to save.
(The instrument will state either “Successful” or “Failure” if it passed/did not pass. For
“Failure” repeat the steps above.)
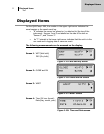
Figure 1-28: RH alignment with High% screen
8. To return to the main menu, press Run/Stop key.
9. Verify the RH sensor is +/-0.5% of the specific percentage. If not repeat the steps above.
10. Remove the alignment salt and finger cot. Replace the Sunshield over the RH sensor
when completed with the sensor alignment.
Example of high RH percentage prior to
sensor alignment. Press up/down arrows
to adjust level after salt has stabilized.
Sensor alignment with High % RH level
Press Enter to save
the alignment.
Alignment salt (remove rubber cap and place over RH
sensor with the sunshield removed)
Once Alignment salt is placed, allow
levels to stabilize (about 15 mins).
Low RH Alignment screen
Adjust % to 33% (using up/down arrow
keys) and press Enter (after level has
stabilized) to store sensor alignment level.