


20
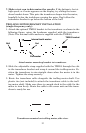
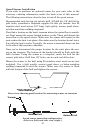
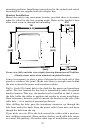
If the base of the transom has a radius, fill the gap between the tran-
som and the sensor with the caulking compound. This will help ensure
a smooth water flow.
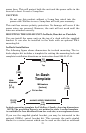
Route the sensor's cable through or over the transom to the sonar unit.
If you need to drill a hole in the transom to pass the connector through,
the required hole size is 5/8".
Caution:
If you drill a hole in the transom for the cable, make sure it is lo-
cated above the waterline. After installation, be sure to seal the
hole with the same marine grade above- or below-waterline seal-
ant used for the screws.
The sensor is now ready for use. Connect the sensor to the accessory
socket on the back of the unit. If you have any questions concerning the
installation of the sensor, please contact your local boat dealer.
POWER CONNECTIONS
(permanent mount units only)
The unit works from a 12-volt battery system. You can attach the
power cable to your boat's accessory or power buss (or directly to the
battery). If you use an accessory buss but have problems with electrical
interference, attach the power cable directly to the battery. If the cable
is not long enough, splice #18 gauge wire onto it.
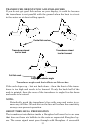
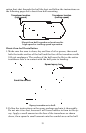
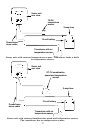
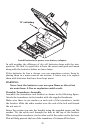
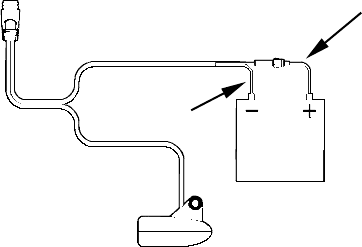
Power connections for the FishEasy 2 family sonar units
(direct battery connection shown).
If possible, keep the power cable away from other boat wiring, espe-
cially the engine's wires. This will provide the best isolation from elec-
trical noise. The power cable has two wires, red and black. Red is the
positive lead, black is negative or ground. Make sure to attach the in-
line fuse holder to the red lead as close to the power source as possible.
For example, if you have to extend the power cable to the battery or
power buss, attach one end of the fuse holder directly to the battery or
12 volt
battery
Black wire
Red wire with
3 amp fuse
To unit