


11
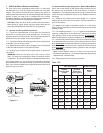
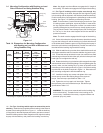
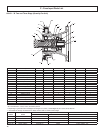
Mounting Instructions
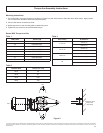
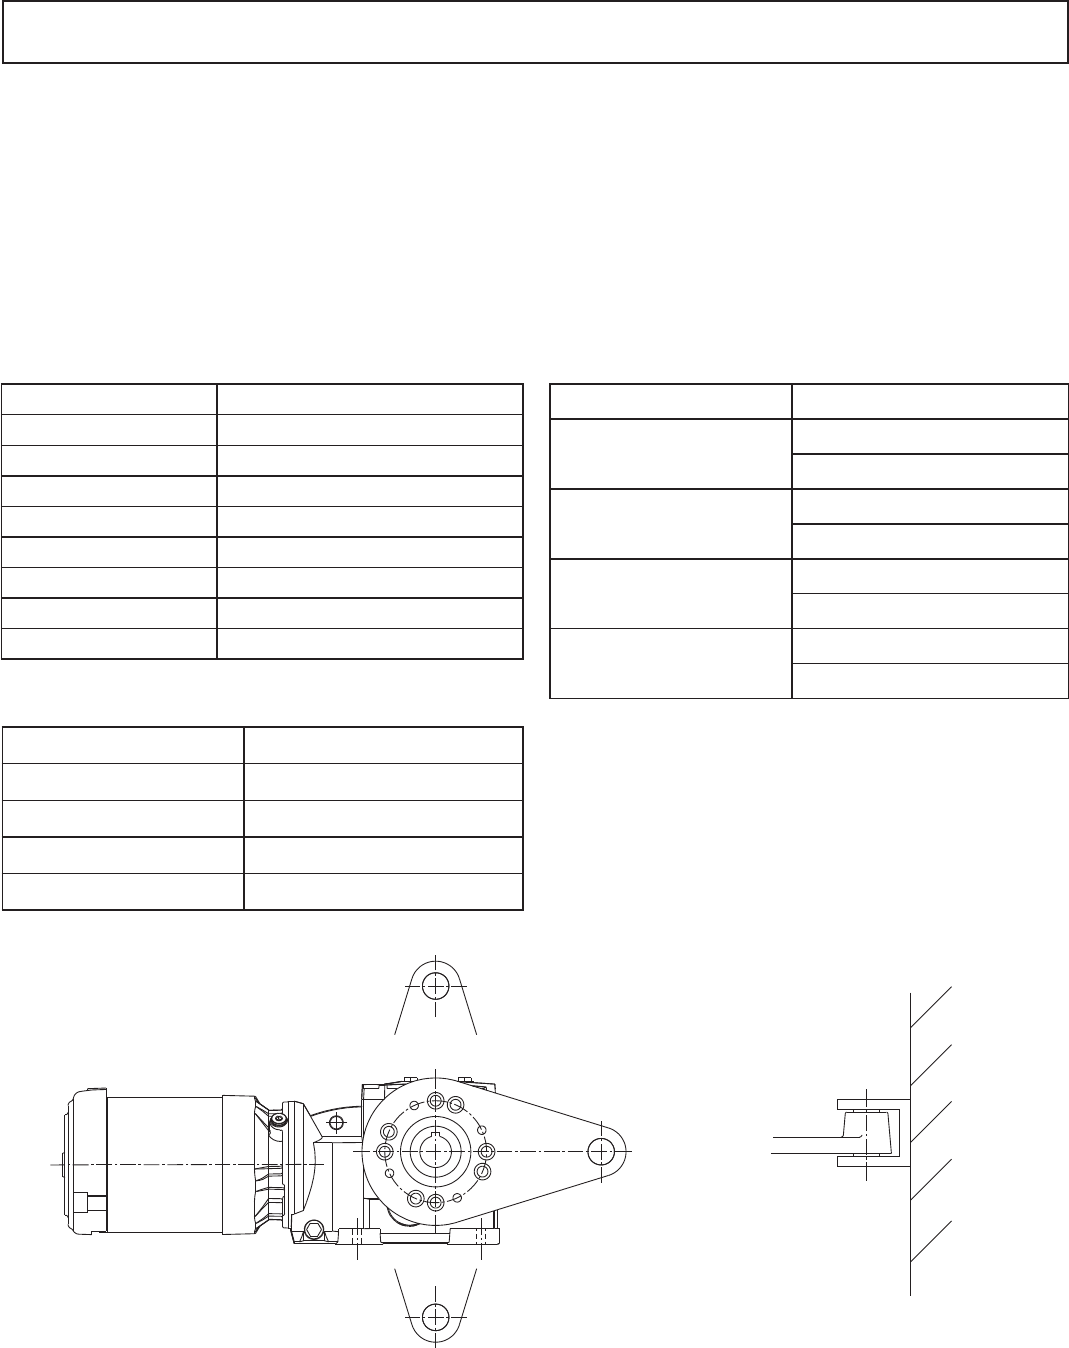
1. For Series 3000, mount the torque arm as shown in Figure 5 to side of the reducer where the driven shaft enters. Apply Loctite*
432 or equal to the threads of each bolt before assembly.
2. Connect the reducer to the driven shaft.
3. Attach torque arm to the mounting plate or attachment point.
4. Tighten the cap screws to the recommended torque.
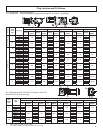
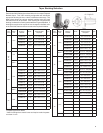
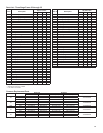
Series 3000 Torque Arm Kits
Table 1
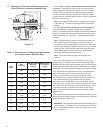
270°
180°
90°
0°
Anchoring of the
Torque Arm
(Top View)
Figure 5
OtN Frame Kit Part ID#
31 ROC100KT001
32 ROC200KT001
33 ROC300KT001
34 ROC400KT001
35 ROC500KT001
36 ROC600KT001
37 ROC700KT001
38 ROC800KT001
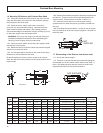
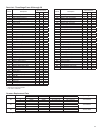
Fastener Size Torque ( Ft. Lbs)
M10 49
M12 87
M16 220
M20 430
Table 2
Table 3
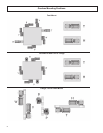
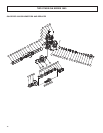
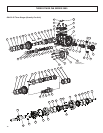
Torque Arm Assembly Instructions
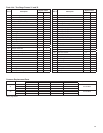
OtN Frame(s) Kit Hardware
31 and 32
Screws (4)
Roll Pin (1)
33, 34, 35
Screws (3)
Roll Pin (1)
36 and 37
Screws (4)
Roll Pin (1)
38
Screws ( 8 )
Roll Pin ( 2 )
* The following trade names, trademarks and/or registered trademarks are used in this material by Emerson Power Transmission Corporation are NOT owned or controlled by Emerson Power Transmission
Corporation and are believed to be owned by the following parties: LOCTITE: Henkel Corporation. Emerson Power Transmission Corporation cannot and does not represent or warrant the accuracy of
this information.