


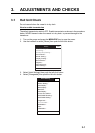

3. ADJUSTMENTS AND CHECKS
3-3
5. Release the [DOWN] switch during lowering to confirm that the transducer stops
lowering.
6. Press the [DOWN] switch again to re-start lowering. Confirm that the transducer
stops at the moment when the lower limit switch is pressed.
7. Confirm that the [UP] switch operates in a similar manner.
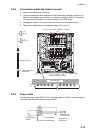
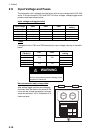
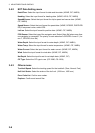
8. Check that LEDs on the panel of the control box light as follows:
1) The UP, MD and DN LEDs light when corresponding limit switch is pressed.
2) The UP and DN LEDs light while UP and DOWN switches are pressed and ex-
tinguish when the switches are released.
9. Set the TEST/NORMAL switch to [NORMAL].
10. Check that the transducer is mid-protruded when the (mid-protrusion position)
switch is pressed. Confirm that the LED above the switch blinks while the trans-
ducer is being lowered, a short beep sounds and the LED lights when the trans-
ducer stops at the mid position.
11. Press the switch (fully lowered position) and then the switch. Confirm that
the LED above the respective switch blinks while the transducer is being lowered
or raised, and a short beep sounds when the transducer is fully lowered or raised.
12. Press the OFF switch. Confirm that the transducer is completely retracted and the
power is off.
13. Confirm that the transducer is raised when the switch or the OFF switch is
pressed.
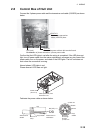
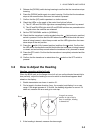
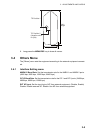
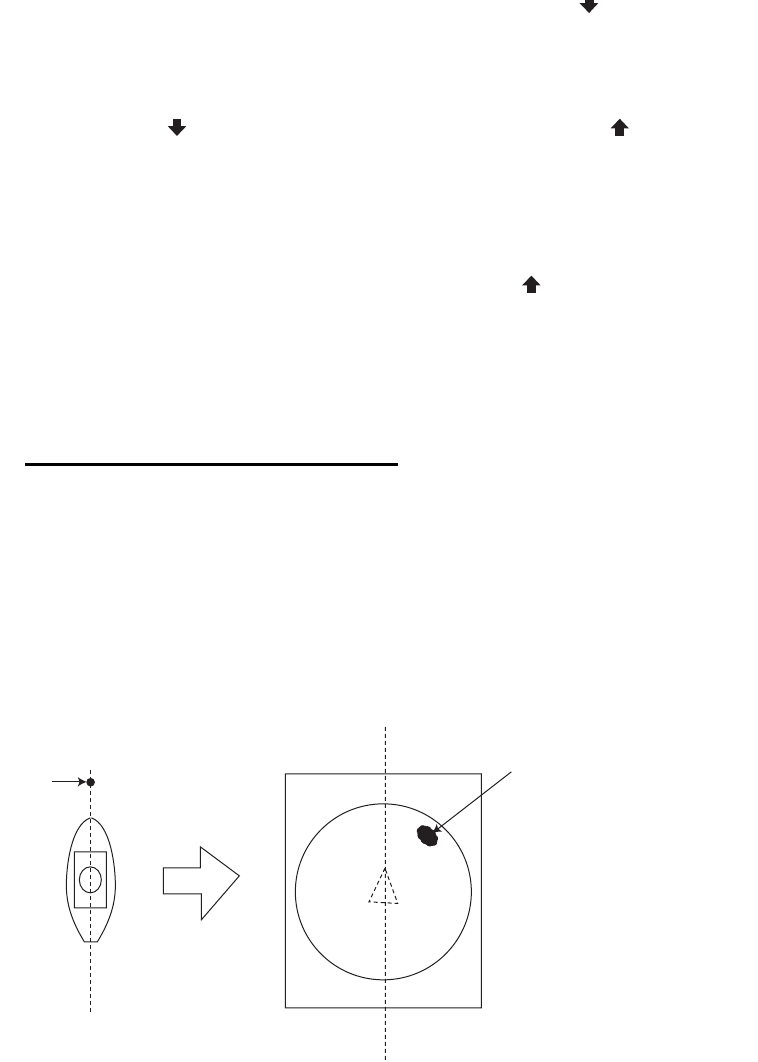
3.2 How to Adjust the Heading
Heading correction at the hull unit
When the BOW mark on the flange of the hull unit can not be directed toward ship’s
bow perfectly, adjust the heading so an echo which is dead ahead appears dead
ahead on the display.
1. Enable transmission as shown in section 3.1.
2. Find a target in the bow direction (buoy, for example) and display it on a near
range. If the target appears at 12 o’clock, the heading alignment is correct. If it
does not, measure the error and go to next step.
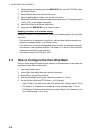
3. If the heading is skewed, measure the skew angle.
If target's on-screen
position is right of ship's
bow, for example, heading
is skewed left.
Buoy