


Fishnder 400C Owner’s Manual
InstallIng the FIshFInder 400c
Selecting a Location for a Shoot-Thru-Hull Installation
When installing a transducer, the installation location must be the
following:
• Solid berglass, without any air bubbles, laminates, llers, or
dead air space.
• In an area of clean (non-turbulent) water at all speeds.
• The location must not be over any strakes or behind any
obstruction on the hull that would create turbulence.
NOTE: Many modern hulls have a dedicated pocket for
shoot-thru-hull transducer installation. If you are unsure if your
hull is equipped with a pre-located pocket, contact your hull
manufacturer.
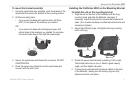
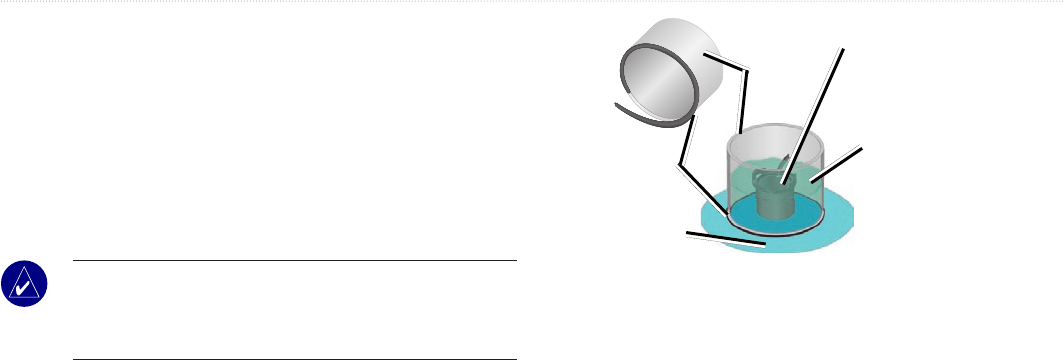
To test the location:
1. FabricateatestdevicefromasectionofPVCpipeoracan,
asshowninthefollowingillustration.
2. Temporarilysealthetestdevicetothehullwithcaulkingor
RTVsealer,andllwithwaterorlightmineraloil.
3. Placethetransducerinthewater,pointeddirectlyat
thebottomandweightitdown.Settheunitforoptimum
performance.Ifthesonarperformanceissignicantly
degraded,anotherlocationmustbetested.
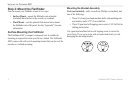
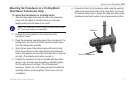
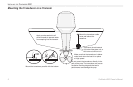
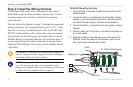
Testing the Location
PVC pipe
or a can
Weight the transducer
to hold it in place.
Fill a pipe or can with
water or a light mineral oil.
Hull surface
Strip caulk or
RTV sealer
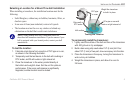
To permanently install the transducer:
1. Lightlysandthesurfaceofthehullandfaceofthetransducer
with400gritwetordrysandpaper.
2. Buildadamusingstripcaulkabout1/4"(6mm)tall.Pour
about1/8"(3mm)oftwo-part,slow-cureepoxyintothedam.
3. Placethetransducerintheepoxy,turningthetransducerto
workoutanyairbubbles.
4. Weightthetransducerinplace,andallowittocurefor
24hours.