


SKU 93880 For technical questions, please call 1-800-444-3353 PAGE 11
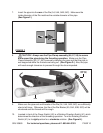
11. Connect the Power Cord Plug (49) into the nearest 110 volt, grounded, electrical
outlet.
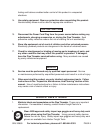
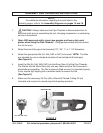
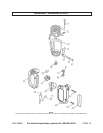
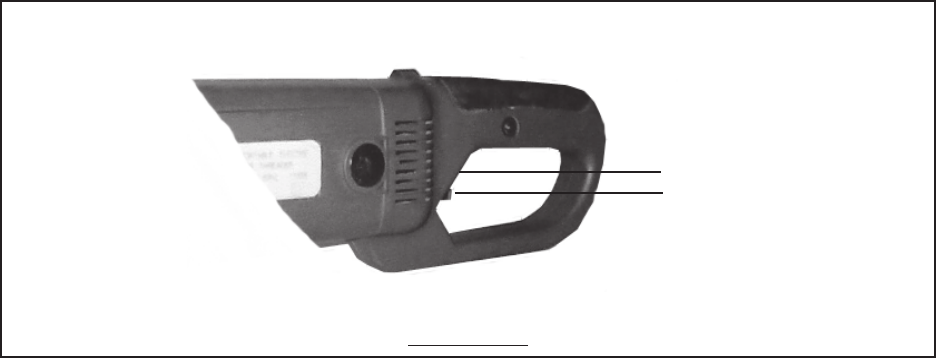
12. While holding the Handle (40, 46) with one hand, press the Power Switch (42) in
and pull up on it to turn on the Pipe Threader. Apply pressure until the Die (54,
54A, 54B, 54C) engages the pipe, cutting two to three threads. (See Figure H.)
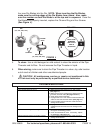
POWER SWITCH (42)
ROTATING
DIRECTION SWITCH (41)
FIGURE H
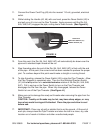
13. From this point, the Die (54, 54A, 54B, 54C) will automatically be drawn over the
pipe and a standard taper thread will be cut.
14. Stop threading when the end of the Die (54, 54A, 54B, 54C) is flush with the end
of the pipe. At this point, the correct size has been reached to produce the proper
joint. To continue beyond this point would make a straight or running thread.
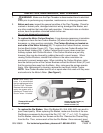
15. To stop threading, release the Power Switch (42) to stop the Pipe Threader.
Allow
the Pipe Threader to completely stop.
Then turn the Rotating Direction Switch
(41) to the left position for a counterclockwise rotation of the Die (54, 54A, 54B,
54C). Pull in and up on the Power Switch to turn on the Pipe Threader and
disengage the Die from the pipe. When fully disengaged, release the Power
Switch to turn off the Pipe Threader. (See Figure H.)
16. Make sure not to damage the newly cut threads when removing the pipe from the
Pipe Threader.
CAUTION: Freshly cut threads may be hot, may have sharp edges, or may
have sharp metal turnings still attached. Clean the pipe and allow to cool
before use.
17. IMPORTANT: Clean any oil spill or splatter that is on the ground. At the end of
each job, always clean the Pipe Threader and store the tool in a clean, dry, safe
location out of reach of children and other unauthorized people.