


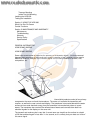
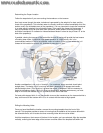
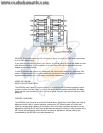

Inside the boat there is often a channel or conduit used for other wiring, which can be used to
route the transducer cable forward. The transducer cable should not be cut or shortened, and
care should be used not to damage the cable insulation. Also, be sure to route the cable as far as
practical from the antenna cable of VHF radios or tachometer cables to reduce the possibility of
interference.
If the cable is too short for your application, extension cables are available at a reasonable cost
which can extend the transducer cable up to a total of 50 feet. Call Humminbird Customer
Support for more information.
INSTALLATION
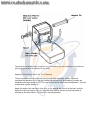
INSTALLING THE HDR 600
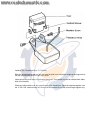
Before installing the HDR 600, gather the parts you need: HDR 600, “U” Bracket, mounting
hardware, cable ties and transducer cable.
Next, consider where to mount the HDR 600. Try different positions on the console or deck of the
boat. Remember that the cables for the transducer and power must reach the mounting location.
Extension cables are available.
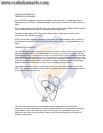
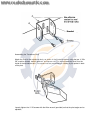
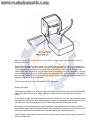
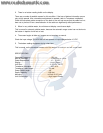
The mounting surface should be visible to the boat operator and adequately supported to protect
the HDR 600 from excess wave shock and vibration. Allow at least 2” clearance at the back,
sides, and top of the unit for connection, air flow, and ease of removal and installation.
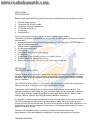
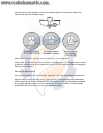
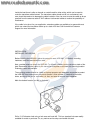
Mark the desired location and drill a pilot hole.
Drill a 2 1/8” diameter hole using a hole saw and hand drill. This is a standard hole saw readily
available for rental or purchase. Or, any marine service shop can handle this task.