11
TK-760G/762G
REALIGNMENT
5-4. Programming Software Description
The KPG-56D programming disk is supplied in 3-1/2" disk
format. The software on this disk allows a user to program
TK-760G/762G radio via a programming interface cable
(KPG-46).
5-5. Programming With IBM PC
If data is transferred to the transceiver from an IBM PC
with the KPG-56D, the destination data (basic radio informa-
tion) for each set can be modified. Normally, it is not neces-
sary to modify the destination data because their values are
determined automatically when the frequency range (fre-
quency type) is set.
The values should be modified only if necessary. Data
can be programmed into the flash memory in RS-232C for-
mat via the modular microphone jack.
6. Firmware Programming Mode
6-1. Preface
Flash memory is mounted on the TK-760G/762G. This
allows the TK-760G/762G to be upgraded when new fea-
tures are released in the future. (For details on how to ob-
tain the firmware, contact Customer Service.)
6-2. Connection Procedure
Connect the TK-760G/762G to the personal computer
(IBM PC or compatible) with the interface cable (KPG-46).
(Connection is the same as in the PC Mode.)
6-3. Programming
1. Start up the programming software (KPG-56D), select
"firmware program" in the "Program" item, and press the
Return key on your personal computer. This starts up the
firmware programmer.
2. The top screen is displayed. Press any key to advance to
the next screen.
3. Set the communications speed (normally, 57600 bps)
and communications port in the Setup item.
4. Set the firmware to be updated by File select (=F1).
5. Turn the TK-760G/762G Power ON with the [CH
]
switch held down. Hold the switch down for two sec-
onds until the display changes to "PROG 576", the BUSY/
TX LED lights orange. When "PROG 576" appears, re-
lease your finger from the switch.
6. Check the connection between the TK-760G/762G and
the personal computer, and make sure that the TK-760G/
762G is in Program mode.
7. Press F10 on the personal computer. A window opens
on the display to indicate the writing progress. When the
TK-760G/762G starts to receive data, the BUSY/TX LED
lights green.
8. If writing ends successfully, the LED on the TK-760G/
762G goes off and the checksum is displayed.
(Since the TK-762G does not have a display, check the
checksum with the FPU (KPG-56D).)
9. If you want to continue programming other TK-760G/
762G, repeat steps 5 to 8.
4. Check Sum
Executing this function, "TUNING" apears on the display
of the TK-760G while calculation the check sum.
When the calculation is completed, the display returns to
normal and PC displays the check sum of the radio.
5. PC Mode
5-1. Preface
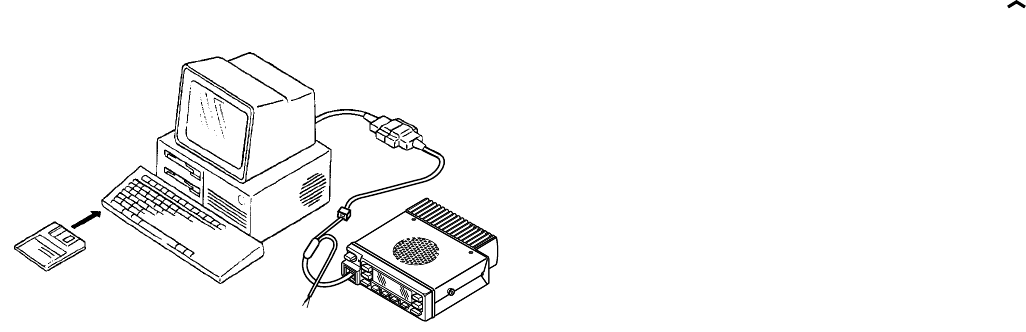
The TK-760G/762G transceiver is programmed using a
personal computer, a programming interface (KPG-46) and
programming software (KPG-56D).
The programming software can be used with an IBM PC
or compatible. Figure 1 shows the setup of an IBM PC for
programming.
5-2. Connection Procedure
1. Connect the TK-760G/762G to the personal computer
with the interface cable.
2. When the Power is switched on, user mode can be en-
tered immediately. When the PC sends a command, the
radio enters PC mode.
When data is transmitted from transceiver, the red LED
blink.
When data is received by the transceiver, the green LED
blink.
Notes :
• The data stored in the personal computer must match
model type when it is written into the flash memory.
• Change the TK-760G/762G to PC mode, then attach the
interface cable.
5-3. KPG-46 Description
(PC programming interface cable : Option)
The KPG-46 is required to interface the TK-760G/762G to
the computer. It has a circuit in its D-subconnector (25-pin)
case that converts the RS-232C logic level to the TTL level.
The KPG-46 connects the modular microphone jack of
the TK-760G/762G to the computers RS-232C serial port.
KPG-46
IBM-PC
KPG-56D
TK-760G/762G
Fig. 1


