


54
VTX OPERATING MANUAL
© 2002 Design, 2014 Doc. No. 12-5382-r01 (10/24/14)
BATTERY REPLACEMENT
The procedures that follow must be closely adhered to to avoid entrance of water into the unit. Dam-
age due to improper Battery replacement (or subsequent leakage of moisture into the unit) is not
covered by the VTX's 2 year warranty.
The Battery Compartment should only be opened in a dry and clean environment with extreme care taken to prevent the entrance
of moisture or dust.
As an additional precautionary measure to prevent formation of moisture in the Battery Compartment, it is recommended that the
Battery be changed in an environment equivalent to the local outdoor temperature and humidity (e.g., do not change the Battery
in an air conditioned environment then take it outside during a hot sunny day).
Inspect the Buttons, Lens, and Housing to ensure they are not cracked or damaged. If there is any sign of moisture inside the unit,
DO NOT attempt to use it for diving until it receives proper service by the Oceanic factory or an Authorized Regional Facility.
Data Retention (calculations & settings)
When the battery is removed, settings* and calculations for repetitive dives are retained in volatile memory until a new battery is
installed.
*Date will have to be set, Time may require adjustment for the time duration that the battery remains out of the unit.
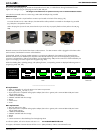
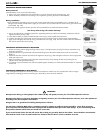
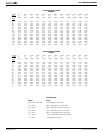
After the Battery is replaced during a 24 hour period after dives, a screen displaying the graphics DATA SAVED CALIBRATE
COMPASS displayed for 3 seconds (Fig. 96) that will then switch to the Compass Calibrate Face Down screen.
> Calibrate the Compass.
Refer to page 45.
> Verify all Set points prior to diving.
BATTERY REMOVAL
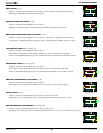
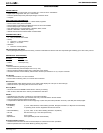
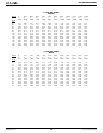
Locate the Battery Cover on the end of the housing:
• Apply a coin to the recessed slot of the Cover and turn it counter clockwise out of the housing (Fig. 97).
• Remove the Battery and discard it according to local regulations governing disposal of Lithium batteries.
INSPECTION
• Closely check all of the sealing surfaces for any signs of damage that might impair proper sealing.
• Inspect the Buttons, Lens, and Housing to ensure they are not cracked or damaged.
• Remove the Battery Cover O-ring and inspect it for any signs of deterioration or deformity. DO NOT use tools to remove the
O-ring.
• To ensure proper sealing, O-ring replacement is highly recommended each time the Battery is replaced.
• Closely examine the Battery Cover and Housing for any signs of damage that might prevent proper threading.
• Closely examine the inside of the Battery Compartment for any signs of corrosion indicating entrance of moisture into the
unit.
WARNING: If damage, moisture, or corrosion is found, return your unit to an Authorized Oceanic
Dealer, and DO NOT attempt to use it until it has received factory prescribed service.
BATTERY INSTALLATION
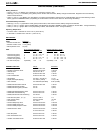
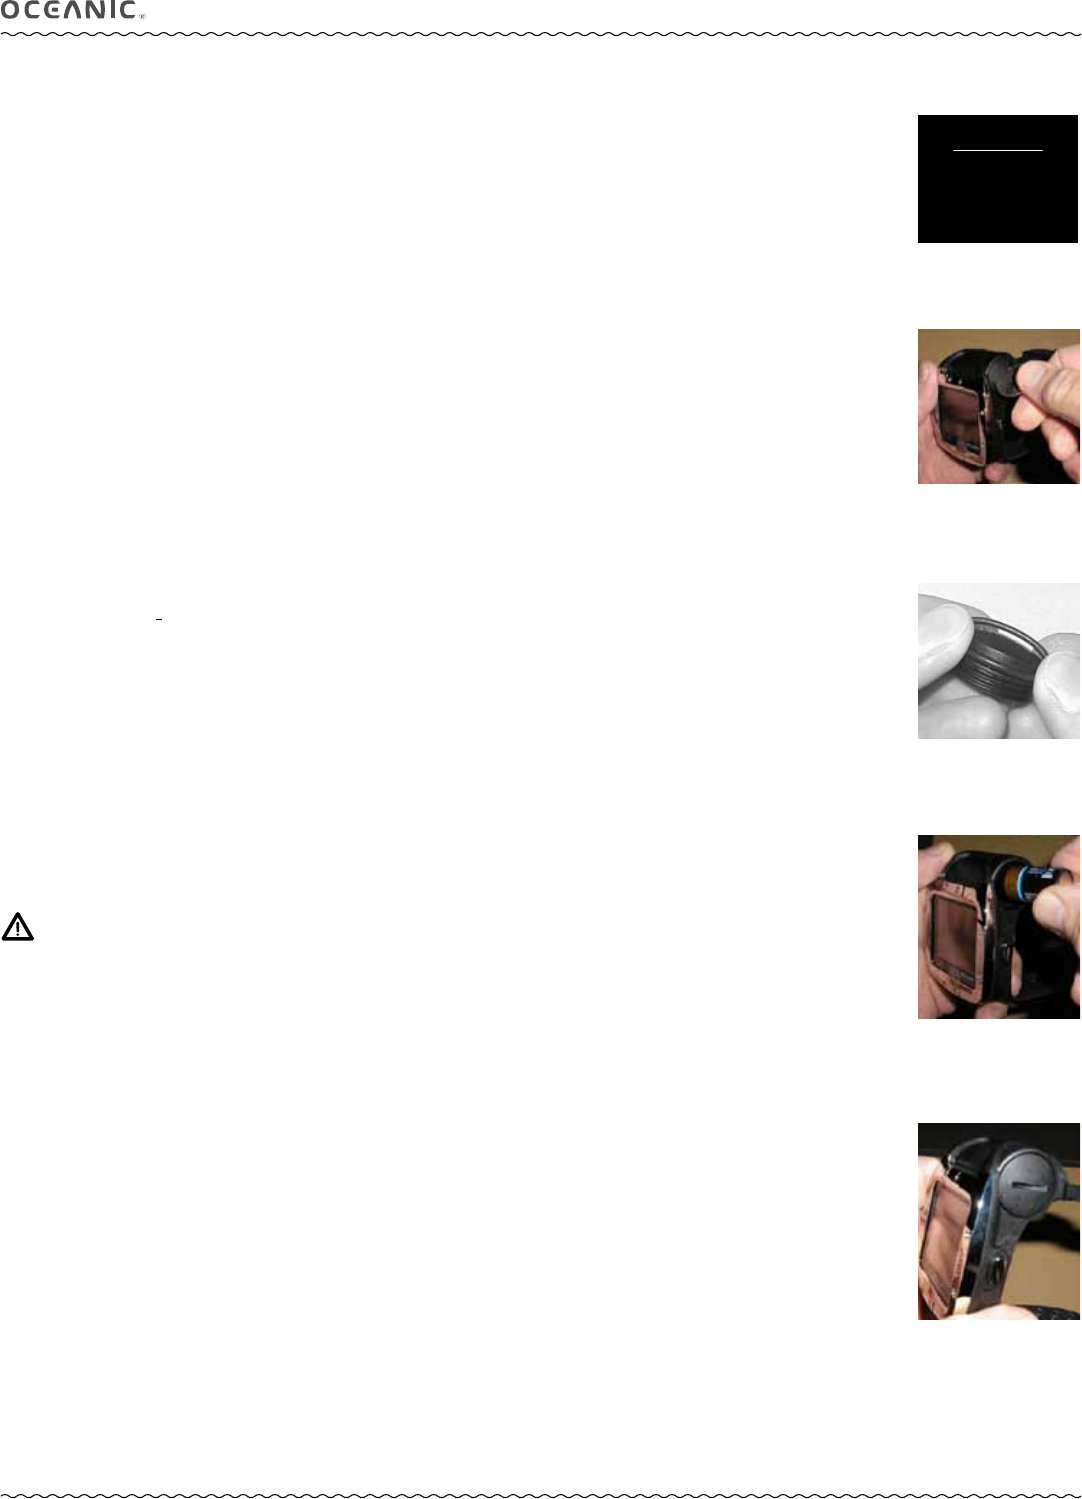
• Lightly lubricate the new Battery Cover O-ring with silicone grease and install it onto the Battery Cover. DO NOT roll the
O-ring over the Threads, instead stretch it slightly to work it down over the slotted end of the Cover into the groove at the base
of the threads (Fig. 98).
• The O-ring must be a genuine Oceanic part that can be purchased from an Authorized Oceanic Dealer.
Use of any other O-ring will void the warranty.
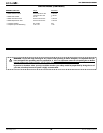
• Insert a new CR2 Lithium 3 Volt Battery (Duracell or equivalent) positive (+) side first into the Battery compartment with the
negative end facing out (Fig. 99).
• Ensure that the Battery is properly installed and the Cover O-ring is evenly seated around the Cover.
• Carefully place the Cover (with spring) into the housing and turn clockwise slowly by hand to ensure proper threading.
• Apply a coin and tighten the Cover by turning it clockwise until secure (Fig. 100). The outer surface of the Cover should be
flush with the outer surface of the housing.
----------------------------------------------------------------------------------------------------------------------------------------------
Fig. 97 - REMOVING THE
BATTERY COVER
Fig. 98 - INSTALLING THE
COVER O-RING
Fig. 99 - INSERTING THE
BATTERY
Fig. 100 - COVER
SECURED
DATA SAVED
CALIBRATE
COMPASS
Fig. 96 - CALCULATIONS
& SETTINGS