


Remote Proportioning Valve Chapter 4: Installation 16 of 30
4-2 Installing the RPV Controls
DANGER!
Disconnect and lock out power before working on equipment. Do not
reconnect electric power until the installation is complete, the work has
been checked, and all tools are removed, and all safety devices are
activated. All electrical work must conform to all codes in effect at the
installation site.
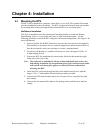
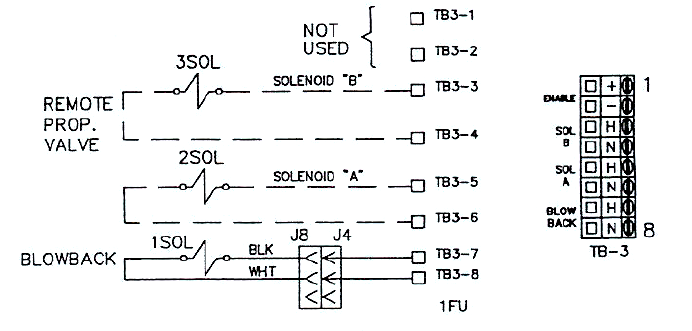
Installing the RPV-A Autoload Knob Box Control
If your RPV has the RPV-A control package, use the following procedure to install it:
1. Disconnect and lock out power to the Autoloader Hopper Loader.
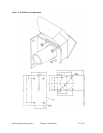
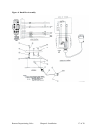
2. Wire the RPV Material A and B solenoids to the Autoloader Hopper Loader control
box using 16AWG wire. See Figure 3.
3. Remove Jumper W3 installed between Terminals 13 and 14 on Terminal Block TB1
in the Autoloader Hopper Loader control box.
Note: The knob box control will not function properly unless you remove this jumper.
4. Toggle the power switch on the Autoload Hopper Loader to the ON position. This
switch must be ON to use the Knob Box Control as a remote ON/OFF switch.
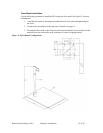
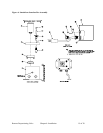
5. Plug the white logic plug connected to the RPV knob box into the receptacle marked
J2 on the left side of the Autoloader control enclosure. See Figure 4 on page 17.
6. Re-connect power.
Figure 3: RPV-A to Autoloader Wiring Diagram