17 CHECK AND ADJUSTMENT
17-1
17 CHECK AND ADJUSTMENT
17.1 Checking and adjusting of instrument constant
Normally, the instrument constant does not have discrepancy. It is recommended you measure and
compare with an accurately measured distance at a location where the precision is specifically
monitored on a consistent basis. If such a location is not available, establish your own base line over
20m (when purchasing the instrument) and compare the data measured with the newly purchased
instrument.
In both cases note that the setup displacement of the instrument position over the point, the prism,
baseline precision, poor collimation, atmospheric correction, and correction for refraction and earth
curvature determine the inspection precision. Please keep in mind these points.
Also, when providing a base line in a building, please note that differences in temperature greatly affect
the length measured.
If a difference of 5mm or over is the result from the comparative measurement, the following procedure
as shown below could be used to change the instrument constant.
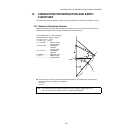
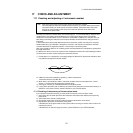
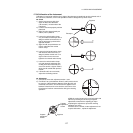
1) Provide point C on a straight line, connecting straight line AB which is almost level and about 100m
long. Measure straight lines AB, AC and BC.
2) Obtain the instrument constant by repeating 1) above several times.
Instrument constant = AC+BC–AB
3) When there is error between written instrument constant value and calculated value, review
Section 17.4 “How to Set the Instrument Constant Value”
4) Once again, measure at a calibrated baseline and compare results.
5) If using above procedure and no difference is found from the instrument constant at the factory or a
difference of over 5mm is found, contact TOPCON or your TOPCON dealer.
17.1.1Checking of the accuracy of the non-prism mode
If you reset the instrument constant, you must check the accuracy of the non-prism mode.
1) Set a prism 30 to 50 meter apart from the instrument and measure the distance to the prism by
prism mode.
2) Take off the prism and set a (white) board.
3) Change the mode to the non-prism mode and measure the distance to the board.
4) Repeat above procedure and measure some points.
If the difference of the prism mode and non-prism mode is the range of ±10mm even one time, the
instrument is normal.
If the difference is never the range of ±10mm, contact TOPCON or your TOPCON dealer.
Note: Each of the Prism mode and Non-prism mode has instrument constant.
You must obtain the instrument constant of prism mode. If you reset the instrument constant
of the prism mode, you must vary the non-prism constant (Non-prism-short, Non-prism-
long) by the same quantity as the amount of increase or decrease of the instrument
constant of the prism mode.
A
C
B


