


5. Use this method to assemble your favorite Programs into A3000 memory. When all are
in memory create a new Volume ([DISK]: [VOLUME]: [VOLUME] page, select
“>NEW”), name and save all the favorite data together.
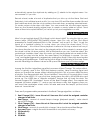
The Push Knobs and Real-time Loop Start and End
Point Designation
The simplicity with which you can create perfect sample loops on the A3000 makes it a
pleasure to use. It shows some of the new thinking that went into the A3000 for break-
beat users. The A3000 let’s you use the Knob controls like Punch in / Punch out buttons on
a tape recorder. You use them to define the Loop Start and Loop End points. For
example, if you are going to create an 8 bar loop, your recording should include at a
least few bars out front and a bit extra at the end.
Setup:
1. [EDIT]: [TRIM/LOOP]: [Config] page. Set End Type to ADDRESS. Set ZERO to ON.
Reading the sample in Address units lets you see the number of samples taken
(44,100 per second if your sample rate is 44.1 kHz). The ‘Zero’ parameter means that
you will make cuts only on zero cross points. You could alternatively set ‘Snap’ to on –
this will only allow loops where the level of the loop end matches the loop start. These
make for perfect loops without those annoying clicks or pops at the joint.
2. [EDIT]: [TRIM/LOOP]: [Wave] page shows the entire length of the recorded sample. (If
your wave begins at approx. 4410, that represents the start point of your recorded
data. The pre-trigger parameter defaults to record 100ms of data before the Start
Point – at 44,100 that’s approximately 4,410 samples). The Wave page shows the full
length of the recorded data.
3. [EDIT]: [TRIM/LOOP]: [WvMode] page shows the Loop status. Set the “LpMode” or
Loop Mode status to loop the entire wave: “ →O” Use the AUDITION button to play
the sample back. You will want to have the AUDITION key set to ‘toggle’ mode so
that you do not have to hold it down. This is accomplished on the [UTLITY]: [SYSTEM]:
[Keys] page.
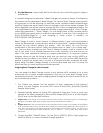
4. Change to the [EDIT]: [TRIM/LOOP]: [Loop] page. By pressing or “punching in” the
Loop Start point, KNOB 2, you can accurately define it and then with KNOB 3 you will
“punch out” the Loop End point during playback. While the sample cycles around
via the AUDITION key, “punch” the Loop Start and Loop End knobs, just prior to the
first beat and just prior to beat 1 of the 9th measure, to create your perfect 8 bar
loops. It continues to play and as it comes around you hear a seamless musical loop!
Just like puching in and out on an analog tape deck, you need only be consistant
about your timing. That is, land on the same spot, just prior to the down beat for both
‘in’ and ‘out’ points. (If you miss the “perfect” loop, you can undo your work and try
again or use the Step feature to search the nearest “zero cross point” by turning the
knob.) The STEP settings changes the resolution of your edits: x1 single sample, x10
samples, x100 samples, x1,000 samples, x10,000 samples. To quickly move from
address 489,734 to address 0, please use the 10,000 sample resolution.