


for each sample. A3000 provides a means to do this at the sample level via the Set Init
function at the sample level
As you get to know how you like to work, you will really appreciate these 2 very powerful
SET INIT features. They make your particular way of working part of your A3000’s
operating system.
MIDI to Sample (MIDI → Smp) and Sample Solo
(SmpSolo)
“MIDI Æ Smp” is short for MIDI to Sample. This useful function comes in very handy when
you are handling lots of samples in memory. It is of particular use during editing and
“mapping” or setting key ranges. When activated, any incoming MIDI signal that triggers
a sample will automatically recall that samples data to the visible edit buffer. This means
that what you hear is what you are editing, and it takes the guesswork out of knowing
what sample’s data you are viewing and changing. Simply touch your MIDI controller
and, if the sample is audible, you are seeing its data in the screen. This function can be
found by pressing Knob #1 from any (mode) screen.
If you work with a MIDI controller, be it a keyboard, drum pads, guitar, bass or wind
controller, this will quickly become one of your favorite tools.
Also on this page is “SmpSolo” (short for Sample Solo). Again, this is found from any
screen by pressing Knob #1. This useful function will allow you to isolate a single sample.
For example, you may have several sounds layered on a key or across the keyboard.
When you activate the “SmpSolo” function on a sample in the list, it will be the only one
heard. This function is used while working on a single sample and you would like to
momentarily hear just that sample—just like a solo button on a mixing console. This is
function is invaluable when working on complex layers.
Editing Samples within a Sample Bank [SmpBank]
You can edit samples even when they have been included in a sample bank. A sample
bank is a convenient way of grouping sounds together. Typically, a drum kit or a piano
multi-sample would be in their own respective banks. If you needed to route the piano to
Effect processor #2, as a sample bank you could do it all in one operation. It would be
awful to have to identify each sample separately in the piano voice, and then have to
send each to the effect individually. But does this mean that you can’t get at the
individual samples to make in depth changes once they are encased in a bank? The
answer is no. Here’s how it’s done:
If you are using a MIDI controller, it is highly recommended that you make use of the
MIDIÆSmp function described above. To set this function: Press Knob 1 from any mode
screen. Set MIDIÆSmp to ON. What you hear, is what you see and edit.
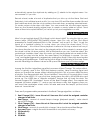
Navigate to [PLAY]: [SAMPLE]: [SmpBank] screen. This screen identifies the current Sample
Bank (on the top line) and the current or last played sample (on the bottom line). The
arrow indicates the sample is part of the bank.
Leave the A3000 on this screen at the
time you enter EDIT mode. This will allow you to view and edit the individual sample’s
data while it is within a bank.