8
External Control Parts (cont’d)
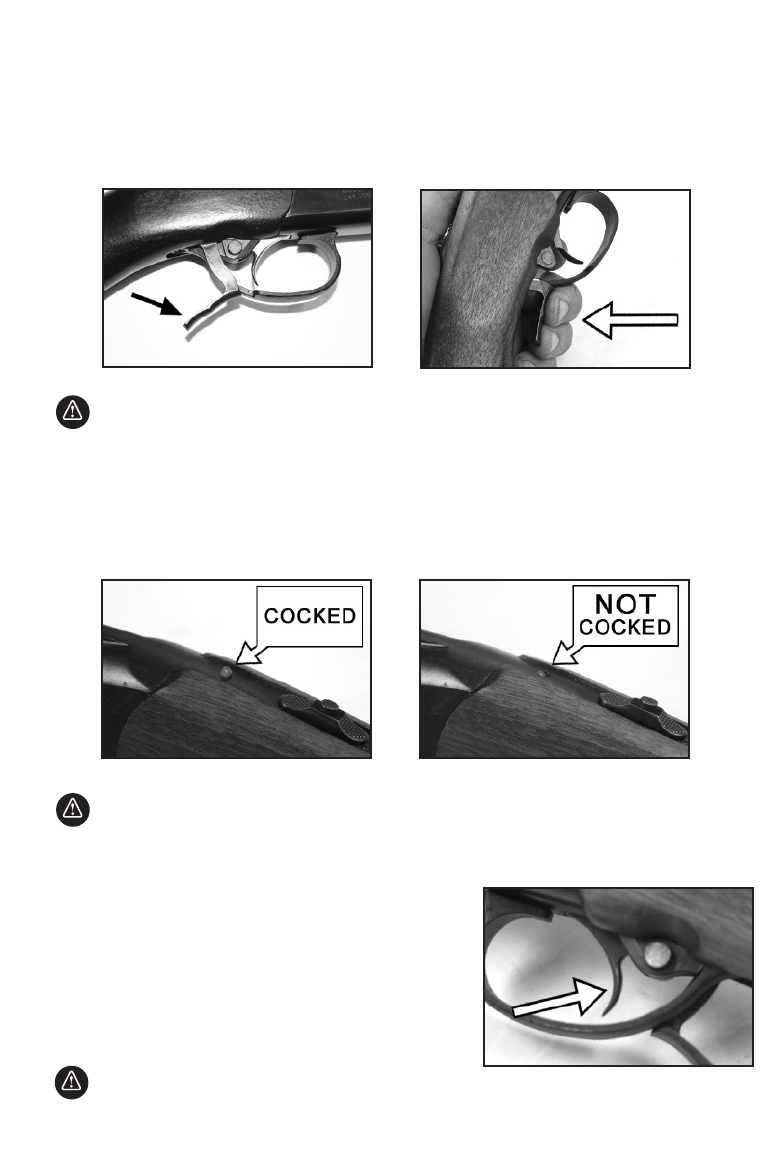
Locking Lever/Cocking Lever: The locking lever/cocking lever is located behind the trigger guard.
(See
Picture 10). The locking lever is used to break open the action to load and/or unload the shotgun. To break
open the action, fully depress or squeeze the locking lever towards the stock. (See
Picture 11). A partial
squeeze/depressing of the lever can be used to decock or cock the firing mechanism.
WARNING
When operating the locking lever, you must: (1) make sure the safety mechanism is in the “ON” or “SAFE” position; (2) keep your fingers away
from the trigger and outside of the trigger guard, and (3) control the direction of the muzzle of the firearm.
Cocking Indicator: The cocking indicator is located on the top back portion of receiver. If the indicator is
protruding out of the receiver, the firing mechanism is cocked. (See
Picture 12). If the indicator is not protruding
out of receiver, the firing mechanism is not cocked. (See
Picture 13).
WARNING
The cocking indicator is merely an aid to help you confirm when hunting or shooting that your firearm is cocked and ready-to-fire. NEVER rely
on the status of the cocking indicator to justify careless handling of your firearm. The cocking indicator may be broken or obscured. Always
handle your firearm as if it were loaded, cocked and ready-to-fire.
Trigger: The trigger is located inside the trigger guard.
(See
Picture 14). If the safety is in the “OFF” or “FIRE: position,
and hammer mechanism has been cocked and trigger is pulled
to the r
ear
, the fir
ear
m will discharge if there is a live cartridge
in one of the chambers.
WARNING
Never pull the trigger until you are actually ready to fire. Keep your fingers off the trigger and outside of the trigger guard until you are ready to pull
the trigger and fire the combination rifle/shotgun. When opening and closing the action and when engaging or disengaging the safety mechanism,
make sure your fingers are outside the trigger guard and away from the trigger.
Picture 14
Picture 10 Picture 11
Picture 12 Picture 13


