E SPOT LED™
©Elation Professional, Los Angeles Ca. 31 www.ElationLighting.com
3. Tap the UP or DOWN button until “FANS” is displayed, press ENTER.
4. The display will show “HIGH/AUTO”.
5. Press UP or DOWN button to select “HIGH” or “AUTO”.
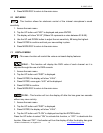
6. Press ENTER to confirm.
7. Press MODE/ESC to return to the main menu.
VER
- Use this function to display the Software version of the unit.
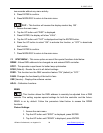
1. Access the main menu.
2. Tap the UP button until “SPEC” is displayed, press ENTER.
3. Tap the UP button until “VER” is displayed, press ENTER.
4. The display will show “V-1.0,” the display may also show, “V-2.0,” “V-9.9” etc.
5. Press ENTER or MODE/ESC to exit.
ADJU
- This function is used to calibrate the various internal motors in the event the
internal homing mechanism become slightly out of adjustment. This function is protected
with a password to prevent unauthorized personal from tampering with the fixture. To
enter the calibration menu follow the steps below:
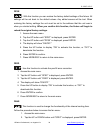
1. Access the main menu.
2. Tap the UP or DOWN buttons until “ADJU” is displayed, then press ENTER.
3. Tap the UP or DOWN buttons until “CODE” is displayed, then press ENTER.
4. The display will show “CXXX”, were as XXX represents the calibration password.
The calibration password is “C050.” Use the UP or DOWN buttons to enter the
proper password.
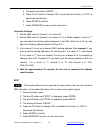
5. Once the proper password is entered the display will read “CHXX”, were as “XX”
represents the fixture channel number, in the case of the E Spot Led™ 1 ~ 16.
6. Select the desired channel to be calibrated by pressing the UP or DOWN
buttons and then ENTER to confirm.
7. The display will then read “xxxx”, were “xxxx” stands for the calibrate values.
8. Adjust the desired calibration value between –128 and 127 by pressing the UP
and DOWN. As you scroll up and down through the calibration values you will
notice slight changes in the wheel or motor you are attempting to calibrate.


