Repair
42 3A2012J
Repair
General Information
• Reference numbers and letters in parentheses in
the text refer to the callouts in the figures and the
parts drawing.
• Always use Genuine Graco Parts and Accessories,
available from your Graco distributor. If you supply
your own accessories, be sure they are adequately
sized, pressure rated, and made of materials com-
patible with your system.
Disconnect the Displacement
Pump
See manual 3A2313 for displacement pump service and
parts information.
1. Flush the pump, see page 30.
2. Stop the pump in the middle of the stroke.
3. Relieve the pressure, see page 24.
4. Disconnect the air supply and fluid hoses.
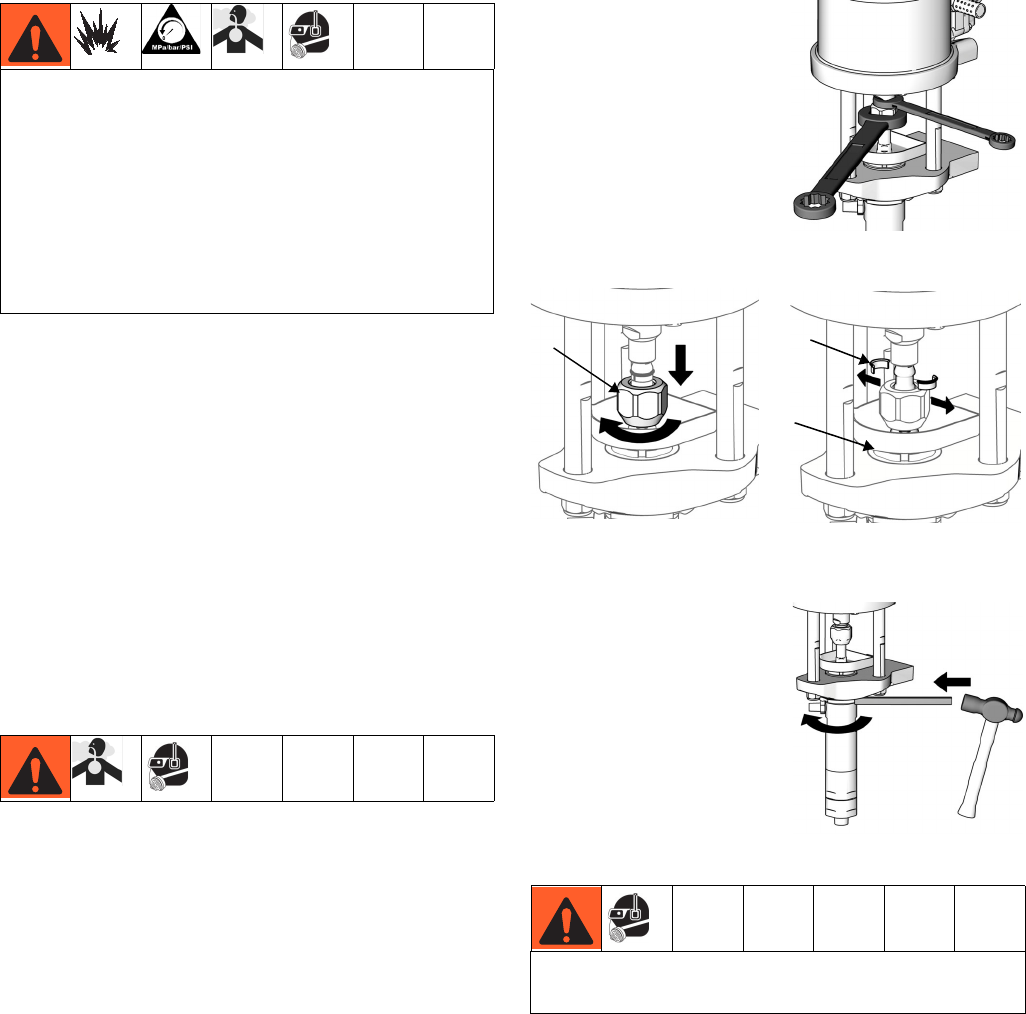
5. Hold the flats of the air
motor piston rod with a
wrench. Use another
wrench to loosen the
coupling nut.
6. Lower the coupling nut
(A) enough to remove
the coupling collars
(B), and then remove
the coupling nut (A).
Use a magnet to aid removing the two collars (B).
7. Pull up on TSL reservoir (C) to remove.
8. Use a hammer and
brass rod to loosen the
jam nut. Unscrew the
jam nut as far as possi-
ble.
9. Protect hands with a
rag then unscrew the
displacement pump by
hand and place on
work bench.
10. See displacement pump manual 3A2313 for pump
service procedures and parts information.
• To reduce the risk of fire and explosion, repair pro-
cedures must be performed in a non-hazardous
location. Move system to non-hazardous location
before performing any repair procedure.
•Follow Pressure Relief Procedure and Shut-
down on page 24 before checking or servicing the
equipment.
• To prevent contact with fluids, flush the system
prior to disassembling any components that con-
tain catalyst or resin.
Threads are very sharp. Use a rag to protect hands
when hand turning or carrying the pump.
ti12815a
ti12812a
ti12813a
A
C
B
ti12816a


