


Shower Base Installation And Operation www.jacuzzi.com Page 7
English
Do not lift a corner to level the base. This will result in loss of contact with the mortar.
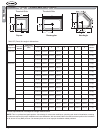
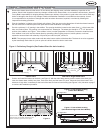
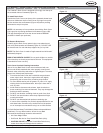
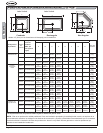
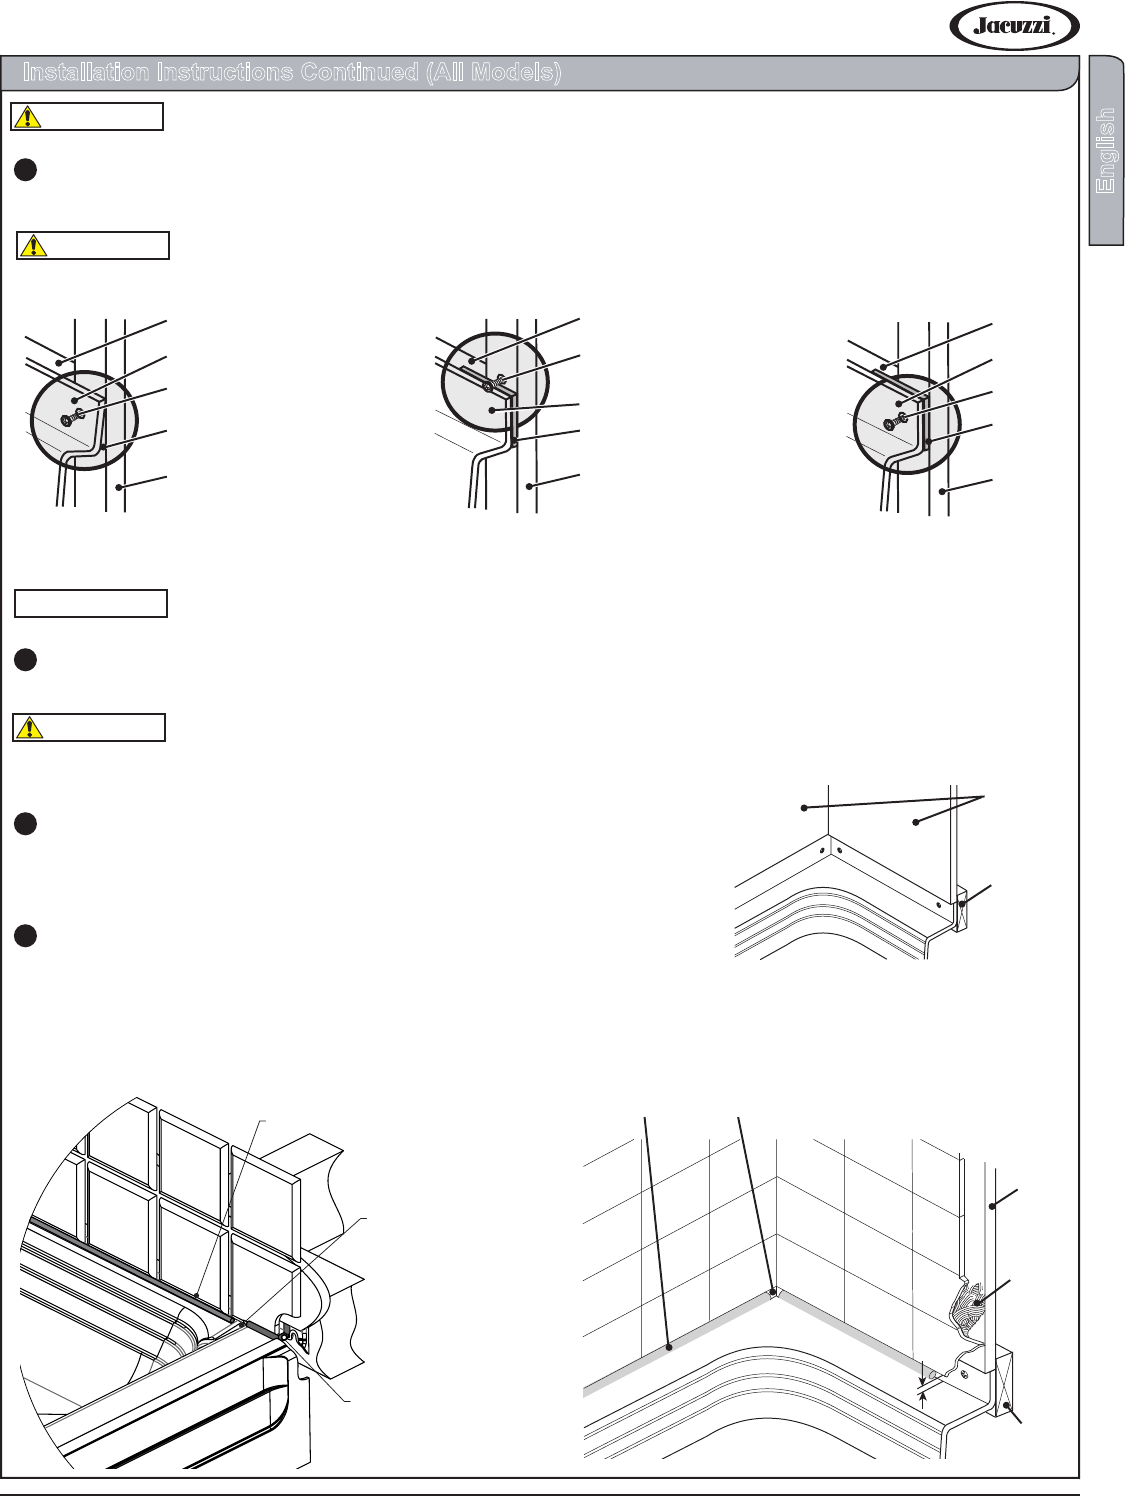
Attach the shower base ange to the stud wall and blocking with the stainless-steel screws provided. Use a minimum of three
screws per ange section, see Figure 8. If there is a gap between the base ange and the stud or blocking, a shim must be
used to prevent distortion or cracking of the ange.
Use the stainless-steel screws provided.
If there is any gap between the base ange and stud or blocking, shims must be used.
Tighten the drain as directed by the instructions that came with the drain kit. After the drain is fully installed, test for proper
drainage.
If the shower base does not drain properly, correct this condition before proceeding with the installation.
Watertight installation is the installer’s responsibility, as drain leakage is excluded from the Warranty. Jacuzzi is
not responsible for reinstallation costs.
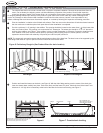
Replace the strainer, if your drain kit came with one, and tape over the drain
hole to prevent nishing material from entering the drain. Place a
cement board or equivalent on top of the shower base ange and
secure to studwall, see Figure 9.
Apply tile, or other nishing material, leaving a 1/8” gap between the
nishing material and the ange lip of the shower base. Seal this gap with
a silicone sealant. Leave a minimum 1/4” weep hole at the back and front
corners of the shower base, see Figures 10 and 11. Add 100% silicone under the tile and backer board on top of the dam
only (see Figures 7 and 10). Refer to local building codes for proper nishing or other trades.
CAUTION
IMPORTANT
Installation Instructions Continued (All Models)
CAUTION
5
Figure 8
INCORRECT INCORRECT
CORRECT
Blocking
Base flange
Use screws
provided
Gap
Stud
Blocking
Base flange
Use screws
provided
Leveling
Shim
Stud
Blocking
Base flange
Use screws
provided
Stud
Leveling
shim
Figure 9
Cement board
Blocking
Silicone sealant
1/4” Min Weep Hole
Leave drain valley clear
of silicone
Figure 10
100% Silicone under
tile on top of dam sealing
the front perimeter from any
possible water passage.
1/8” Gap
Tile
Cement
board
Tile
adhesive
Blocking
1/4” Min Weep HoleSilicone sealant
Figure 11
CAUTION
6
7
8