


Page 8 www.jacuzzi.com Shower Base Installation And Operation
English
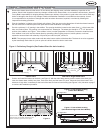
Installation Procedures Continued (All Models)
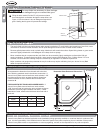
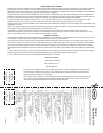
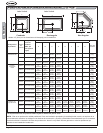
The weep holes are necessary to allow drainage
from leakage through an unsealed tiled grout.
Filling the area marked, Do Not Fill, will prevent moisture
from draining back to the base through the weep holes, see
Figure 12. Such moisture is due to leakage through the tile
grout. Sealing the tile grout will prevent this leakage.
CAUTION
Shim (If
necessary)
Silicone sealant
Cement board
Blocking
Tile
STUD
Grout
DO NOT FILL
Figure 12
9
Clean Up After Installation
• The acrylic nish will give long-lasting beauty when properly maintained. To avoid dulling and scratching of the nish, never
use abrasive cleaners or harsh chemicals. A mild liquid detergent and warm water will clean soiled surfaces.
• Remove spilled plaster with a wood or plastic edge. Metal tools will scratch the surface. Spots left by plaster or grout can be
removed if lightly rubbed with a mild detergent and a damp cloth or sponge.
• Minor scratches that do not penetrate the color nish can be removed by lightly sanding the surface with a 600-grit,
wet-dry sandpaper. To restore the glossy nish, use a special compound like Meguiar’s No. 10 Mirror Glaze. If it is not
available, use an automotive rubbing compound followed by an application of automotive paste wax.
• Major scratches and gouges that penetrate the acrylic surface may require renishing. Ask your Jacuzzi Luxury Bath
dealer for special instructions.
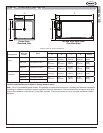
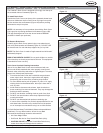
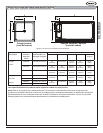
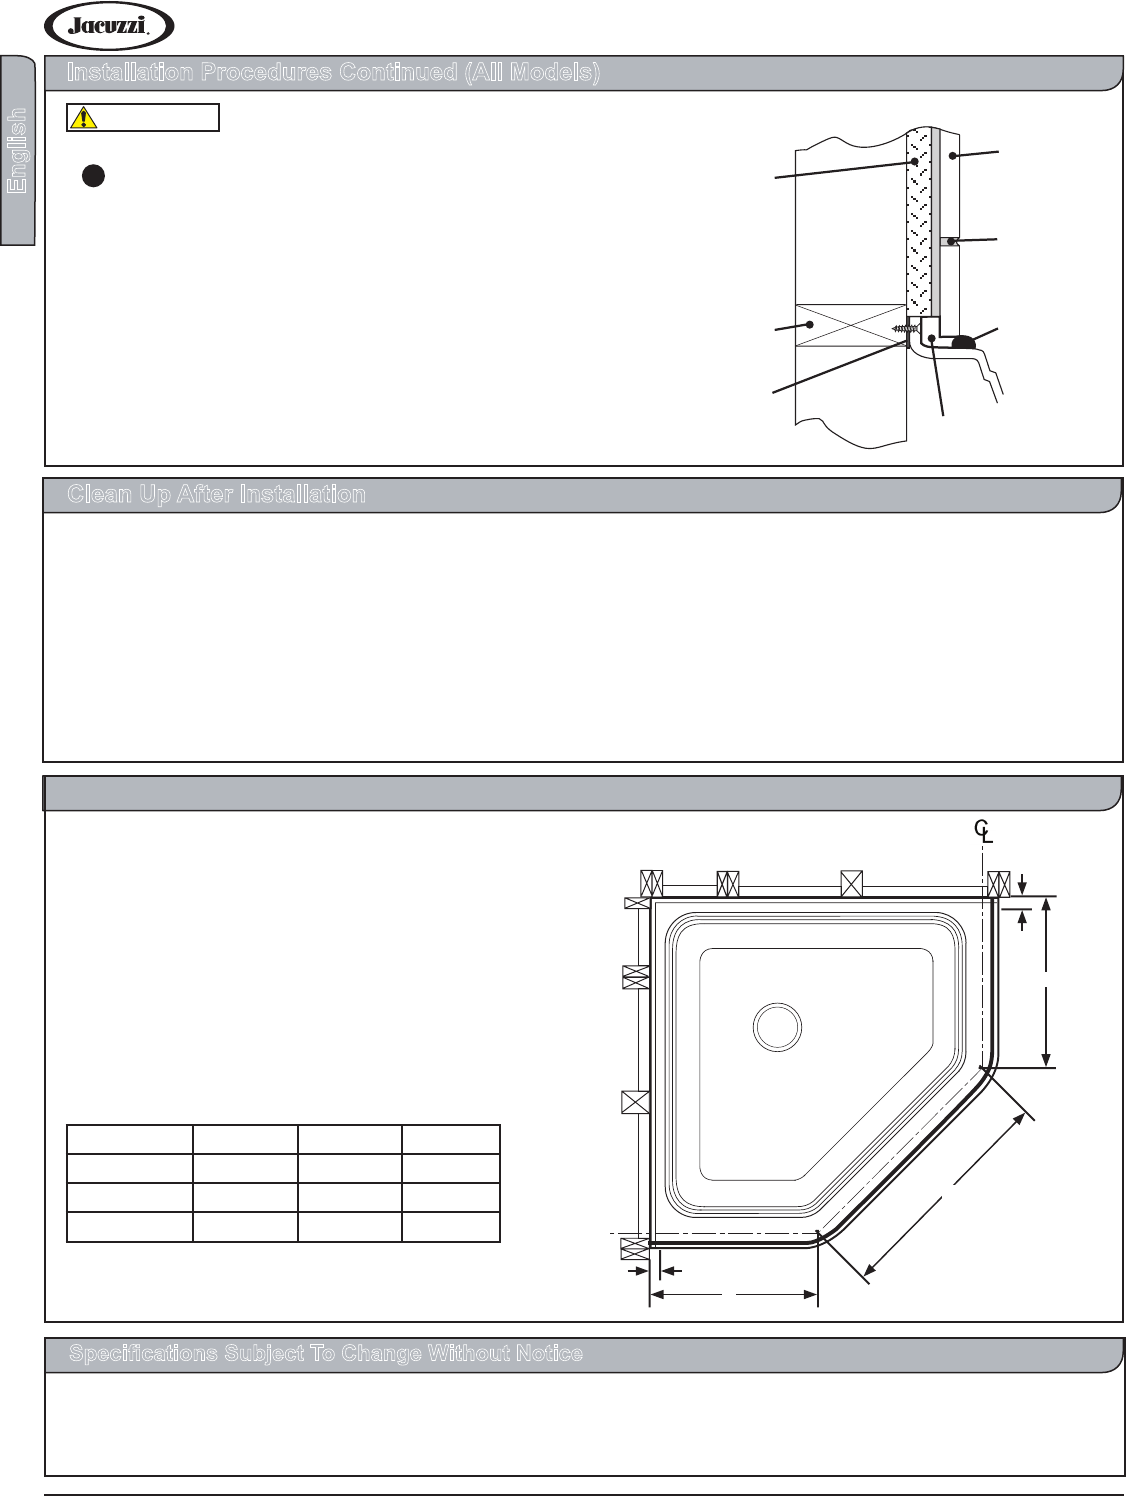
Rough-In Dimension Chart (Neo-Angle Only)
*C represents the dimension from the stud wall to the face
of the nishing materials used in the shower construction. If
Jacuzzi
Luxury Bath surround walls are used, subtract 1-3/8"
from dimension A to arrive at glass enclosure dimensions.
If other materials are used, subtract their thickness from
dimension A.
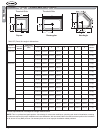
FOR SQUARE & RECTANGULAR SHOWER BASES: If
Jacuzzi
Luxury Bath surround walls are used, subtract
1-3/8" from stud wall of each end to arrive at glass enclosure
dimensions (see front page illustration and chart). If other
materials are used, subtract their thickness from stud wall of
each end.
Model A B C
3838N 16-3/4" 28" 1-3/8"
4242N 20-3/4" 27-3/8" 1-3/8"
4848N 26-3/4" 27-1/2" 1-3/8"
*C
*C
A
B
A
of Threshold
Specications Subject To Change Without Notice
Jacuzzi
Luxury Bath has obtained applicable code (standards) listings generally available on a national basis for products of this
type. It is the responsibility of the installer/owner to determine specic local code compliance prior to installation of the product.
Jacuzzi
Luxury Bath makes no representation or warranty regarding, and will not be responsible for any code compliance.
Determine Glass Enclosure Dimensions