


19
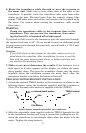
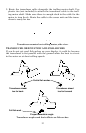
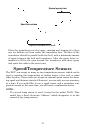
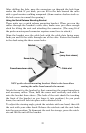
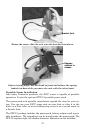
Speed sensor mounting configuration:
side view (left) and rear view (right.)
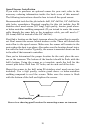
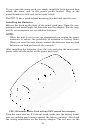
If the base of the transom has a radius, fill the gap between the tran-
som and the sensor with the caulking compound. This will help ensure
a smooth water flow.
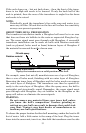
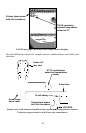
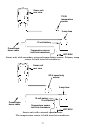
Route the sensor's cable through or over the transom to the sonar unit.
If you need to drill a hole in the transom to pass the connector through,
the required hole size is 5/8". (The hole is 1" (25.4 mm) if you intend to
route the sensor cable through the same hole as the transducer cable.)
Caution:
If you drill a hole in the transom for the cable, make sure it is lo-
cated above the waterline. After installation, be sure to seal the
hole with the same marine grade above- or below-waterline seal-
ant used for the screws.
The sensor is now ready for use. Connect the sensor to the accessory
socket on the back of the unit. If you have any questions concerning the
installation of the sensor, please contact your local boat dealer.
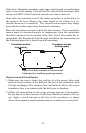
POWER CONNECTIONS
The unit works from a 12-volt battery system. You can attach the
power cable to your boat's accessory or power buss or directly to the
battery. If you use an accessory buss but have problems with electrical
interference, attach the power cable directly to the battery. If the cable
is not long enough, splice #18 gauge wire onto it.
CAUTION:
When using the unit in a saltwater environment, we strongly rec-
ommend that you shut off the power supply to the power cable when
the unit is not in use. When the unit is turned off but still connected
to a power supply, electrolysis can occur in the power cable plug.
This may result in corrosion of the plug body along with the electri-
cal contacts in the cable and the unit's power socket.
In saltwater environments we recommend you connect the power
cable to the auxiliary power switch included in most boat designs.
Transom
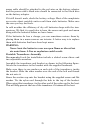
Bottom of hull
Bottom of hull