ENGLISH
23
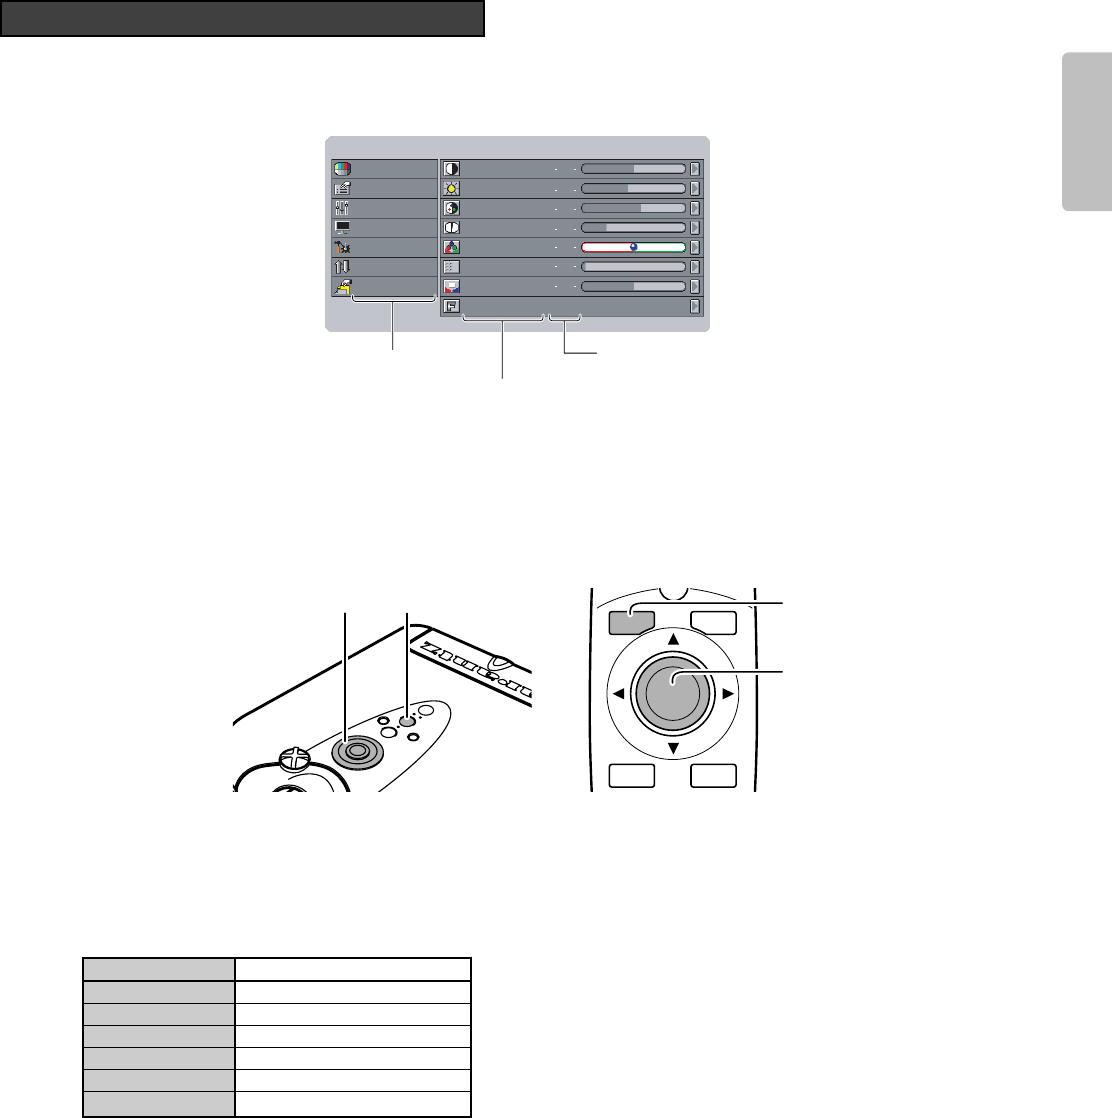
This projector has menus that make setting and adjustment easy.
1. Press the MENU button. The MENU screen appears on the screen.
2. Use the 3 and 4 buttons to select a menu (Picture Adjust, Setting, System, Display, Configuration, Trigger2, Preset) and
press the
2 button.
3. Use the 3 and 4 buttons to select a menu item and press the 2 button.
4. Use the 3, 4, 1 and 2 buttons to make the setting or adjustment of the selected item.
• The current setting or adjustment level is displayed to the right of each menu item.
5. Press the MENU button again to close the menu.
❖ Picture Mode and Memory
This projector offers 6 picture modes: Theater, Standard, Dynamic, User A, User B and User C. Select an picture mode by
pressing the THEATER, STD, DYNA. or USER buttons on the remote control. Moreover, each of these picture modes has 3
indexes for memorizing picture quality adjustments.
Picture mode Index
Theater 1, 2, 3, Default
Standard 1, 2, 3, Default
Dynamic 1, 2, 3, Default
User A 1, 2, 3
User B 1, 2, 3
User C 1, 2, 3
As suggested by the above table, adjust picture quality to your liking and memorize it in indexes 1, 2 and 3.
See “Preset”. (
☞
P.32)
PAT T
.
INPUT ASPECT
MENU V-MUTE
ENTER
1, 5
2, 3, 4
1, 52, 3, 4
Picture Adjust
Menu Standard1
Setting
Display
System
Config
Trigger 2
Preset
Contrast
Brightness
Color
Sharpness
Tint
Noise Reduction
Color Temp.
Fine Menu
50
44
58
7
0
0
3
How to Operate Menus
Main menu
Menu item
Setting or adjustment level


