English - 7
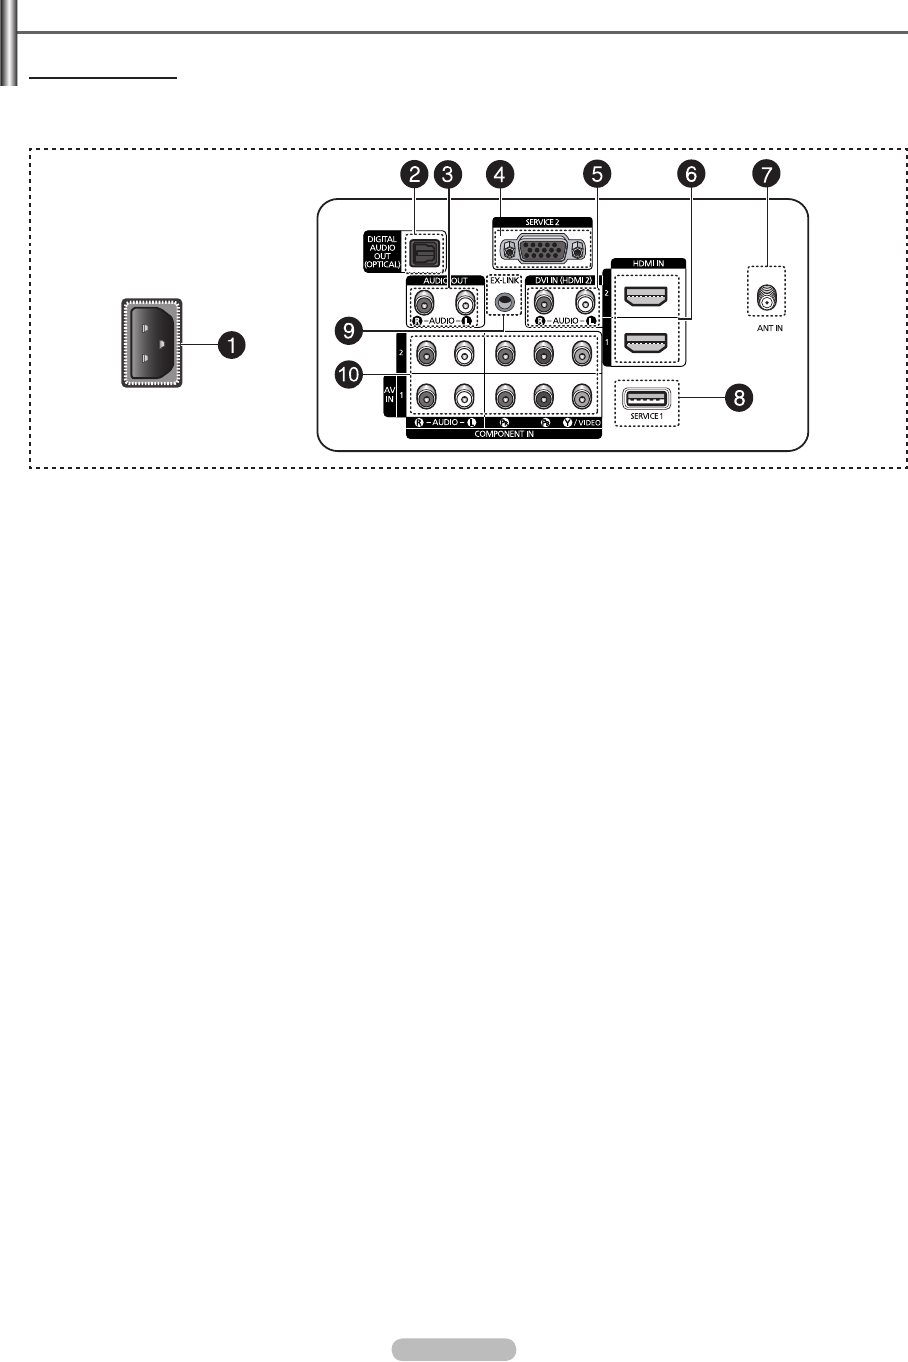
Viewing the Connection Panel
Rear Panel Jacks
Use the rear panel jacks to connect A/V components that will be connected continuously, such as VCR or DVD players. For
more information on connecting equipment, see pages 9-14. The product color and shape may vary depending on the model.
1
POWER IN
Connect the supplied power cord.
2
DIGITAL AUDIO OUT (OPTICAL)
Connect to a Digital Audio component.
3
AUDIO OUT (R/L)
Audio outputs to external devices.
4
SERVICE 2
For service only.
5
DVI IN (HDMI 2) (AUDIO-R/L)
Connect to the DVI audio output jack of an external device.
6
HDMI IN 1, 2
Connect to the HDMI jack of a device with an HDMI
output.
- This input can also be used as a DVI connection with
separate analog audio inputs. An optional HDMI/DVI
cable will be necessary to make this connection.
-
When using an optional HDMI/DVI adapter, the DVI
analog audio inputs on your TV allow you to receive left
and right audio from your DVI device.
7
ANT IN
Uses a 75Ω Coaxial connector for an Air/Cable
Network.
8
SERVICE 1
For service only.
9
EX-LINK
Connect this to the jack on the optional wall mount
bracket. This will allow you to adjust the TV viewing
angle using your remote control.
0
COMPONENT IN 1, 2 / AV IN
Connects Component video/audio.
The COMPONENT IN 1 jack is also used as the AV IN jack.
- Connect the video cable to the COMPONENT IN 1 [Y/
VIDEO] jack and the audio cable to the COMPONENT IN
[R-AUDIO-L] jacks.
Front Panel buttons
Touch each button to operate.
BN68-01580A-Eng.indb 7 2008-05-28 오후 9:42:46


