


HX600S Page 11
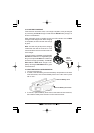
4.1.2 BATTERY CHARGING
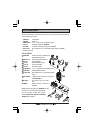
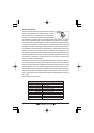
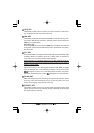
If the radio has never been used, or its charge is depleted, it may be charged
by connecting the CD-36 Charger Cradle with the NC-90 battery charger, as
shown in the illustration.
When the battery pack is inserted correctly, the LED indicator on the CD-36
Charger Cradle will glow red. When charging
is completed, the LED indicator will change
to green.
Note: The radio may be kept in the charging
cradle when the radio is turned off. It is not
recommended to use turn the radio while it is
in the charger.
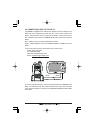
If 12V DC power is available, the supplied E-
DC-19A DC Cable with 12 V Cigarette Lighter
Plug or the optional E-DC-6 DC Cable may
be used for charging the battery. The NC-90,
E-DC-19A and E-DC-6 will charge a com-
pletely discharged FNB-V98LI battery pack
in about 8 hours.
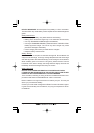
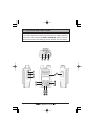
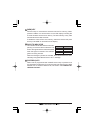
4.1.3 BATTERY INSTALLATION/REMOVAL
1. Turn the transceiver off.
2. To install, insert the battery pack into the battery compartment on the back
of the transceiver, then close the Battery Pack Latch until it locks in place
with a “click.”
3. To remove, open the Battery Pack Latch on the bottom of the transceiver,
then slide the battery downward and out from the transceiver.
Close the Battery Pack Latch
Install the Battery Pack
NC-90
E-DC-6
E-DC-19A