Applications
56
Create default schedule for new cameras:
If selected, a schedule specifying that the camera is
always online will automatically be created in the
[Camera/Alert Scheduler] window.
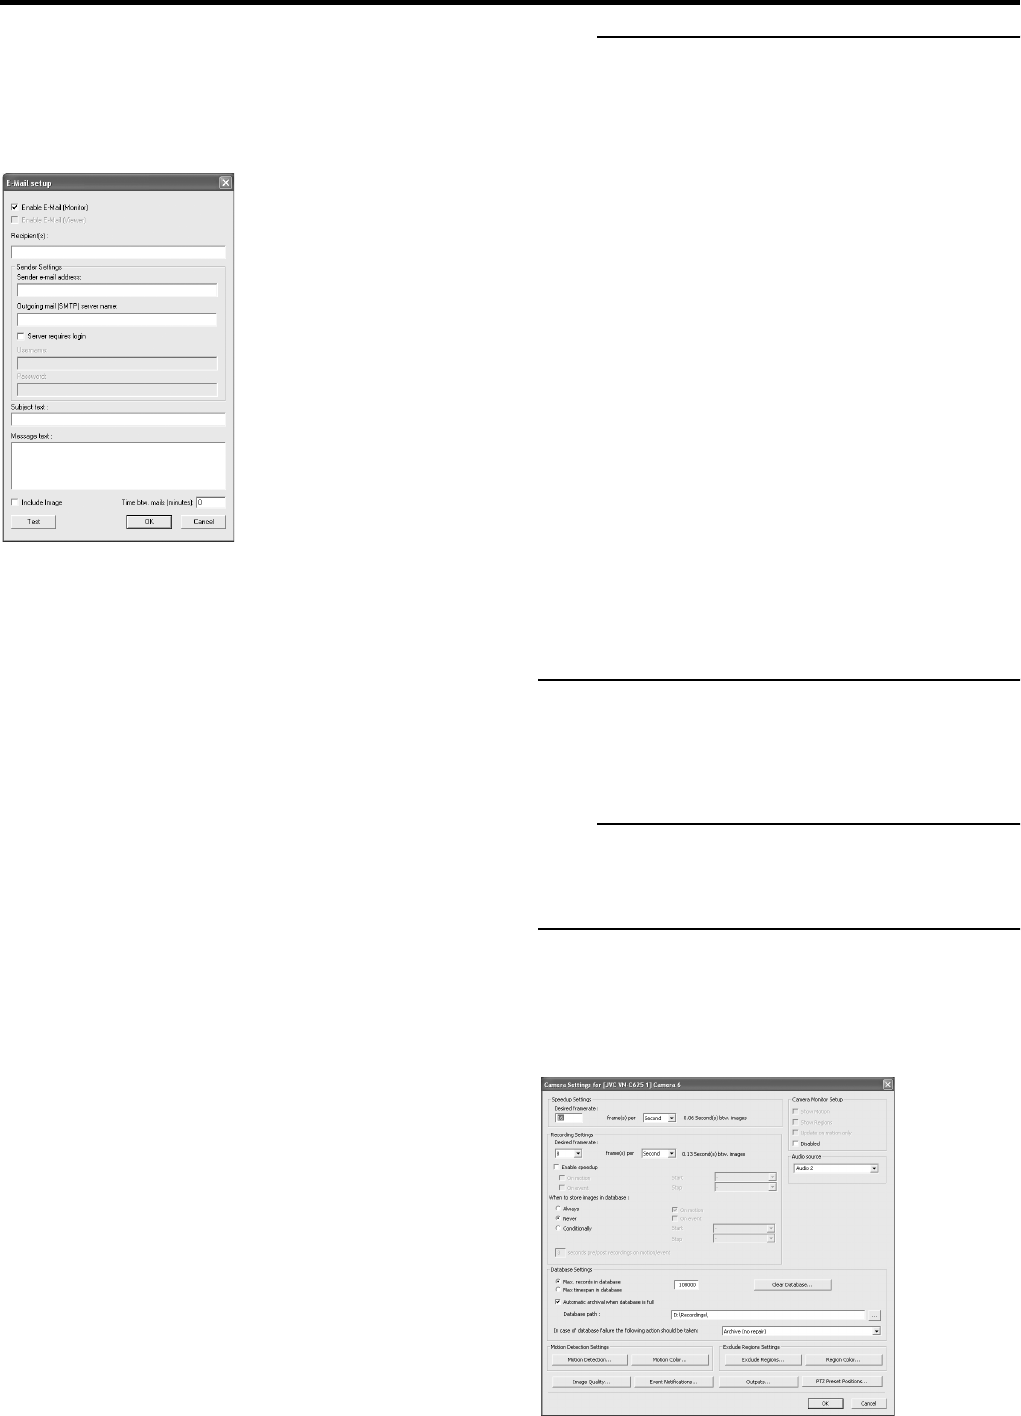
● [Email Settings]
This lets you enable and configure the use of e-mail alerts.
The following items can be specified.
Enable E-Mail (Monitor):
Select the check box to enable use of e-mail alerts.
Recipient(s):
Specify e-mail addresses to which alerts should be sent. If
specifying more than one e-mail address, separate e-mail
addresses with semicolons.
Sender settings:
Specify the sender’s e-mail address, outgoing (SMTP)
mail server name and login settings.
Subject text:
Specify the required subject text.
Message text:
Specify the required message text.
Include Image:
Select the check box to include images in e-mail alerts.
Time btw. mails (minutes):
Specify the required time (in minutes) between the
sending of each e-mail alert.
Note
• You are able to send a test e-mail by clicking the [Test]
button. When the mail address of the sender is
unregistered to the destination mail server, [The email
address of the sender is not valid. ....] will be displayed.
Confirm the e-mail address and SMTP server, and then
re-enter the e-mail address.
• E-mail messages are sent when:
• An input event occurs. (Refer to “Specify an input
event”. Page 47)
• An event button is clicked. (Refer to “Configuring
Event Buttons”. Page 50)
• A generic event occurs (Refer to “Specifying Generic
Buttons”. Page 51)
• When motion is detected, (Motion Detection Settings
Page 54)
• A camera failure occurs. (Refer to “General Settings”.
Page 55)
• An archive error occurs. (Refer to “Archiving”.
Page 57)
To send e-mail, make the settings described in “Specifying
a Scheduler” ( Page 26) to specify periods for sending
e-mail messages.
When setting the E-mail, test and verify that the E-mail is
sent.
Database Settings
Let you specify the database settings.
Note
• In this manual, recorded image data is referred to as the
database.
• The recorded images are saved as database.
1 Select [Camera Record Setting] in the Main Menu.
2 Select the required camera in the [Device
Manager] section and click the [Camera
Settings] button.
3 Specify the [Database Settings].
[E-Mail setup] window
☞
☞
☞
☞
☞
☞
☞


