Applications
60
CAUTION
• Do not change the analog camera network settings unless
absolutely necessary. If changes are unavoidable, consult
your nearest JVC dealer.
• When a host name is modified, it is necessary to “Add the
Windows user” with the [User Administration] of the
[Image Server Setting]. ( Page 64)
• Do not set the default gateway in each of the camera
network and intranet in the [OS Setting] window. The
operation may not function properly.
● Date and Time Properties
To synchronize the time with the internet time server or to
specify the date and time manually, click [Update Now].
Automatically synchronize with an Internet server:
Select the check box to synchronize the time with the
internet time server.
CAUTION
• [Date and Time Properties] are not set unless the [Update
Now] button is clicked.
• Changing the time setting may prevent normal playback of
simultaneously made recordings.
Note
• When selected, you cannot specify the date and time
manually. The entries in the boxes cannot be changed.
NTP polling interval:
Specify the required time (in minutes) between each
synchronization with the internet time server.
Date:
Enter the date when specifying the date manually.
Time:
Enter the time when specifying the time manually.
Time zone:
Specify the time zone.
Auto adjustment of the Daylight Saving Time:
You may setup and use the Daylight Saving Time (DST)
depending on the time zone of the area you are in.
CAUTION
• Please do not set any duplicate date and time of any
previous recorded data which may overlap.
Note
• If the time is synchronized with the internet time server but
the specified time zone is incorrect, the system will not run
at the correct time.
● Volume Properties
Adjust the volume using the slider bar.
● LOAD configuration
The preset configuration files are read and displayed on the
screen.
● SAVE changes
Inputs and selected content are configured to the system.
Note
• The date and time will not be updated manually when
[SAVE changes] is clicked. To update the date and time
manually, go to the [Date and Time Properties] section.
● CANCEL changes
All inputs and selected settings are ignored.
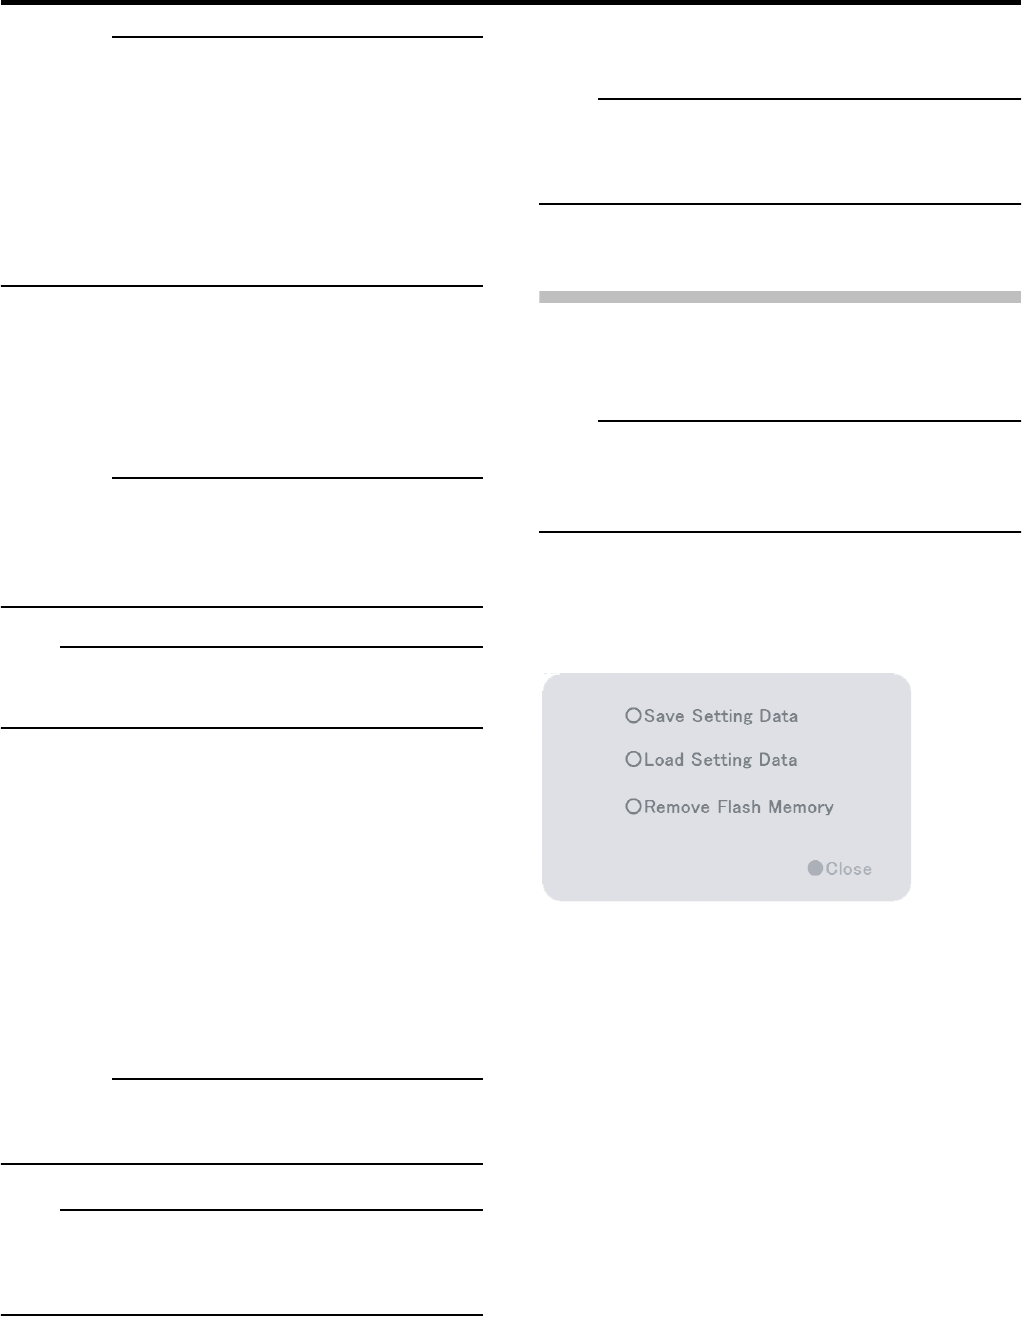
Flash Memory Utility
You can save and restore set values to the flash memory.
Note
• Items specified in [Screen Setup], [Camera Record
Setting] and [Image Server Setting] in the Main Menu will
not be saved.
1 Select the [Flash Memory Utility] of the Main
Menu.
The [Flash Memory Utility] window is displayed.
●[Save Setting Data]
This lets you save the settings data to the flash memory.
1 Insert the flash memory into the SERIAL port
on the front or rear panel.
2 Select [Save Setting Data].
• You will be asked to confirm that you want to save the
settings data.
• A message informing you that the flash memory cannot be
detected may be displayed. If this happens, wait
approximately 30 seconds, then select [Save Setting
Data] again.
3 Click the [OK] button.
• The settings data will be saved.
• When saving is finished, a message informing you that the
data has been saved will be displayed. Click the [OK]
button again.
☞
[Flash Memory Utility] window


