10
A
C
D
B
E
115 VAC 50/60 Hz
Applicator # 98136
MAXIMUM WORKING
PRESSURE 500 PSI
S/N: MMDDYY-XX-X
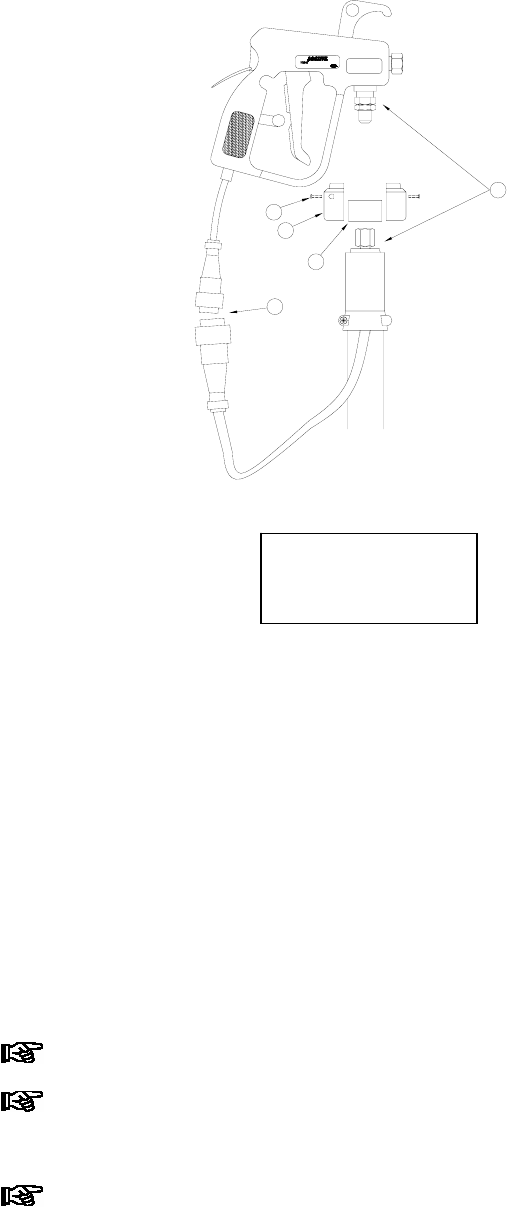
a) Loosely connect the JIC fitting on the supply hose to the handheld applicator, then tighten the JIC fitting using
two 11/16” open end wrenches, one on the handheld applicator and one on the hose. A 13/16” open-end wrench
is required for the handheld applicator swivel.
b) Install the heat shield insulation over the handheld applicator/hose connectors.
c) Assemble the two pieces of the handheld applicator swivel shield over the insulation assuring the top collar of
the shield fits into the groove machined in the JIC male handheld applicator fitting.
d) Insert the two screws into the handheld applicator swivel shield and tighten.
e) Properly align the keys of the hose electrical connector to the handheld applicator connector and securely screw
these parts together.
4.6 Automatic Mounted Applicators
The following points should adhere to:
Notice
Automatic applicators are mounted to appropriate brackets using supplied hardware.
Notice
Insulation spacers must be used between the applicator head and the mounting bracket and between the mounting
bracket and mounting bolt to assure minimum heat loss and allow the applicator to efficiently reach the desired
temperature.
Notice
Fittings connecting the applicator head to the hose should be kept as short as possible and insulation should be
applied over the hose/head fitting connections to further minimize heat loss since this connection is unheated.
Hot melt fittings must be heated before loosening or tightening to prevent damage. New and clean supply hose
fittings do not need to be heated.
Figure 2
Handheld Applicator to
Supply Hose Installation
