12
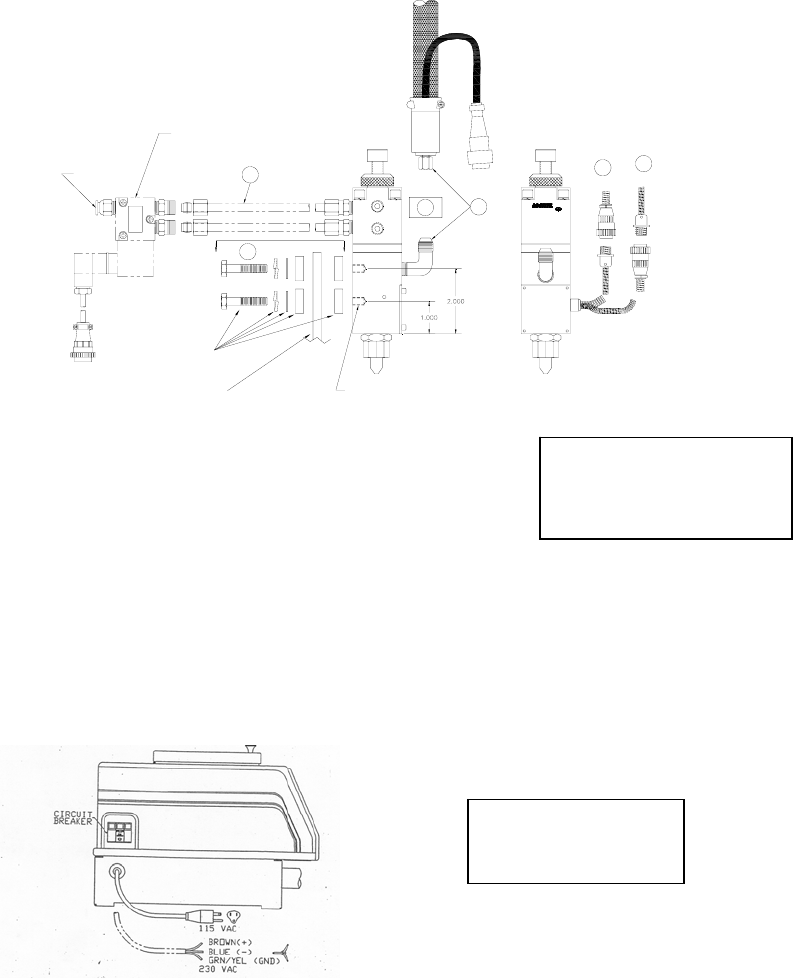
1. (A) Loosely connect the mounting bolts through the insulation washers and mounting bracket into the
applicator head (see illustration). Tighten the bolts using a 7/16” open-end wrench.
2. (B) Loosely connect the JIC fitting on the supply hose to the applicator head, and then tighten the JIC
fitting using an 11/16” open-end wrench. Ensure you have a tight connection to avoid leaks.
3. (C) Install the heat shield insulation supplied over the applicator/hose connector, secure with tie wraps.
4. (D) Place the compression nuts and sleeves over the two aluminum tubes and insert between the
applicator head and air solenoid valve. Tighten the compression nuts using two ½” open end wrenches
until snug.
5. (E) Properly align the keys of the four-pin solenoid connector with its mating connector on the
applicator head and rotate the locking nut fully to make connection.
6. (F) Properly align the keys of the nine-pin hose electrical connector with its mating applicator
connector head and rotate the locking nut fully to make connection.
See 4-way solenoid installation instructions for valve connections (included
with solenoid valve).
HOSE
SOLENOID
SN XXXXXXX
AIR APPLICATO R
115 VAC
ITEM # 989357
MOUNTING HARDWARE
INCLUDED WITH APPLICATOR
CUSTOMER SUPPLIED OR
OPTIONAL MOUNTING BRACKET KIT
F
REGULATED
AIR IN
E
C
B
A
D
VALVE SHOWN FOR
REFERENCE ONLY
1/4-20 HOLES
4.9 Electrical Wiring
The Loctite® series hot melt units use single phase, 100 to 130 VAC, or 200 to 240 VAC, 50 to 60 Hz power
sources, each with earth ground for safety. The 115 VAC melt units come equipped with a 20 amp molded plug for
convenient connection to a 115 VAC, 20-amp receptacle. The 230 VAC melt units come equipped with a 20 amp
molded plug for convenient connection to a 230 VAC, 20-amp receptacle.
Figure 5
Melt Unit
Electrical Connection
Figure 4
Mounted Air Applicator to
Supply Hose Installation


