


2-15
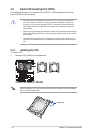
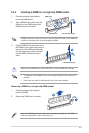
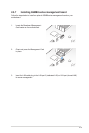
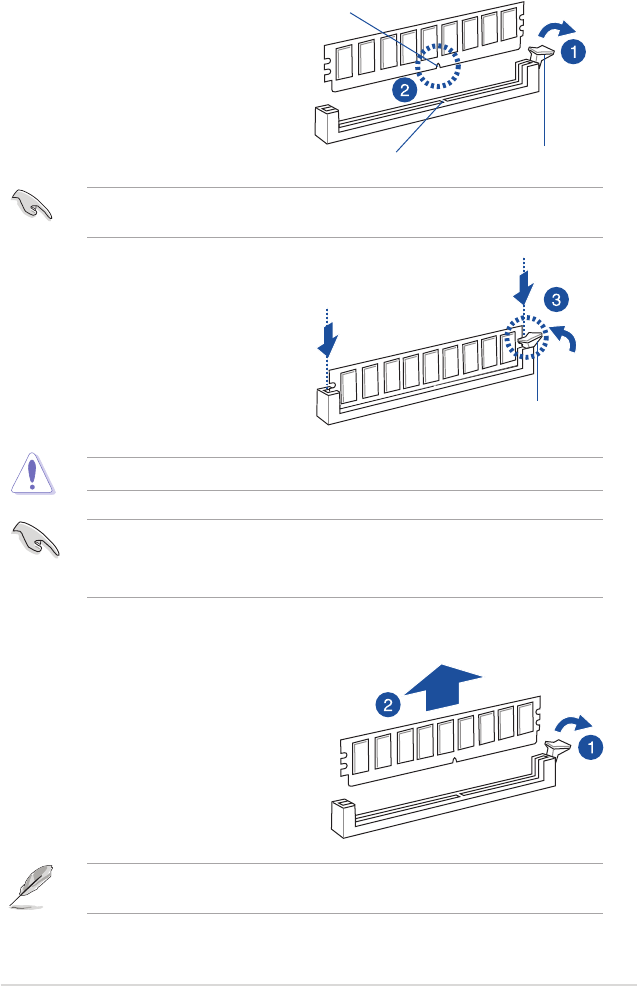
2.4.3 Installing a DIMM on a single clip DIMM socket
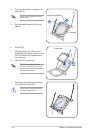
3. HoldtheDIMMatbothendstheninsert
theDIMMintothesocket.Applyforceto
bothendsoftheDIMMsimultaneously
until the retaining clip clicks into place
andtheDIMMisseatedsecurelyin
place.
Locked Retaining Clip
1. Press the retaining clip outward to
unlocktheDIMMsocket.
2. AlignaDIMMonthesocketsuchthat
thenotchontheDIMMmatchesthe
DIMMslotkeyonthesocket.
Unlocked retaining clip
DIMM notch
DIMM slot key
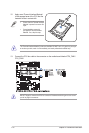
1. Press the retaining clip outward to
unlocktheDIMM.
2. RemovetheDIMMfromthesocket.
Removing a DIMM from a single clip DIMM socket
• ToinstalltwoormoreDIMMs,refertotheuserguidebundledwiththemotherboard
package.
• Refertotheuserguideforqualiedvendorlistsofthememorymodules.
SupporttheDIMMlightlywithyourngerswhenpressingtheretainingclips.TheDIMM
mightgetdamagedwhenitipsoutwithextraforce.
AlwaysinserttheDIMMintothesocketVERTICALLYtopreventDIMMnotchdamage.
ADIMMiskeyedwithanotchsothatittsinonlyonedirection.DONOTforceaDIMMinto
asocketinthewrongdirectiontoavoiddamagingtheDIMM.