


CN 2110
Omega
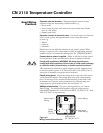
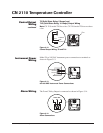
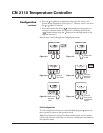
To access the user configuration menus,
1. Press and hold the
and buttons. After three seconds the display
will begin to toggle between the current security code and LocH
(LOCK). The Temp and Set Point LEDs will turn on. See Figure 4.3.
2. Press the
or button to adjust the value to the appropriate security
number (see Security Codes and Levels). Only the value is displayed
during adjustment. See Figure 4.4.
3. Press and hold the Set Point ( ) button and press the or
buttons to scroll the configuration menus. The display will show the
name of the menu and then begin to toggle between the name and the
current value. See Figures 4.5 and 4.6.
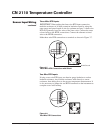
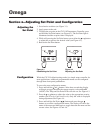
Adjusting the
Set Point
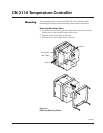
1. Set selection switches (see Figure 3.1).
2. Apply power to the unit.
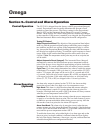
3. To adjust the set point on the CN 2110 Temperature Controller, press
and hold the Set Point button (see Figure 4.1). The Set Point light is
illuminated and the set point value is displayed.
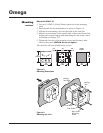
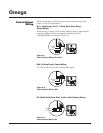
4. While still pressing the
Set P
oint button, press either the or button
to adjust the set point to the desired value (see Figure 4.2).
5. Release the
Set P
oint button.
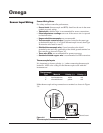
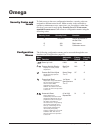
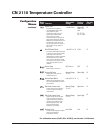
While the CN 2110 default settings make it a simple setup controller for
most applications, additional programmable menus can be configured
through three front-panel pushbuttons.
Configuration
Figure 4.1
Establishing the Set Point
Load
Alarm
°F
°C
Temp
Set
Point
Set Point
Chromalox
®
2110
Load
Alarm
°F
°C
Temp
Set
Point
Set Point
Chromalox
®
2110
Figure 4.2
Adjusting the Set Point
12
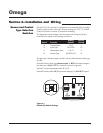
Section 4–Adjusting Set Point and Configuration
Section 4—Adjusting Set Point and Configuration