


14
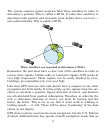
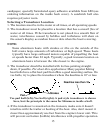
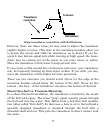
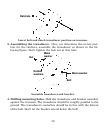
Your Skimmer transducer typically comes packaged with a one-piece
stainless steel bracket for mounting it to the transom of your boat. The
optional trolling motor mount uses a one-piece plastic bracket with an
adjustable strap. These are "kick-up" mounting brackets. They help pre-
vent damage if the transducer strikes an object while the boat is moving.
If the transducer does "kick-up," the bracket can easily be pushed back
into place without tools.
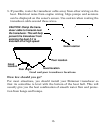
Read these instructions carefully before attempting the installation.
Determine which of the installation methods is right for your boat.
Remember, the transducer location and installation is the most
critical part of a sonar installation.
Recommended Tools and supplies
If you prefer the option of routing the cable through the transom, you
will need a 5/8" drill bit.
NOTE:
The following installation types also call for these recommended
tools and required supplies that you must provide (supplies listed
here are not included):
Transom installation
Tools include: two adjustable wrenches, drill, #29 (0.136") drill bit, flat-
head screwdriver. Supplies: high quality, marine grade above- or below-
waterline sealant/adhesive compound.
Trolling motor installations
Tools: two adjustable wrenches, flat-head screwdriver. Supplies: plastic
cable ties.
Shoot-through hull installations
Tools: these will vary depending on your hull's composition. Consult your
boat dealer or manufacturer. Other tools are a wooden craft stick or
similar tool for stirring and applying epoxy, and a paper plate or piece
of cardboard to mix the epoxy on. Supplies: rubbing alcohol, 100 grit