1-2
Mounting method
A typical mounting method is shown in the outline drawing at the back of this
manual. Consult ship’s owner, dockyard and user to determine appropriate mount-
ing method. Pay attention to safety (strength, watertighness) first, followed by
ease of maintenance and inspection.
Tank length
Shorten the transducer tank so the trans-
ducer is lowered into water as deep as pos-
sible.
Pay particular attention to the tank length Lt.
Determine the length of the main shaft as
described in the paragraph “Assembling and
mounting of hull unit.”
Note 1: Do not shorten the 1 meter retrac-
tion tank. Shortening it may also necessitate
shortening of the top part of the main shaft,
thereby destroying the watertight construc-
tion of the 1.17 meter shaft.
Note 2: When the retraction tank is con-
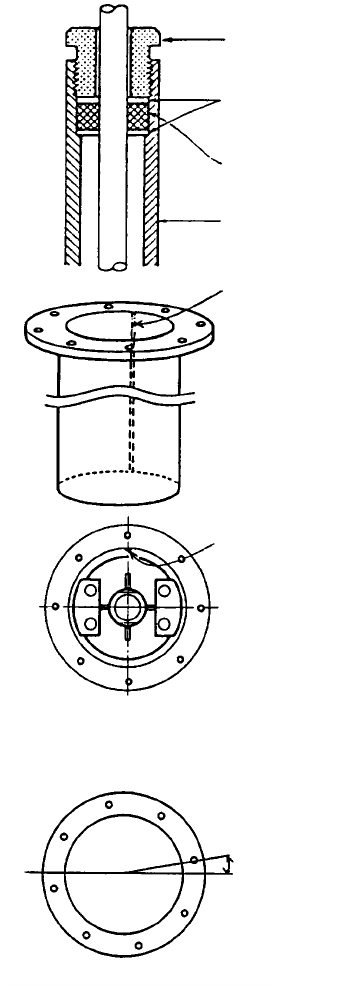
structed locally, finish it so that welding beads
do not protrude on the inner surface of the
tank. The tank guide will hit the bead, burn-
ing out the raise/lower motor. Also, do not
position the welding bead in the ship’s fore-
aft line.
Note 3: Use of other manufacturer’s tank is
permitted. However, the dimensions should
be the same as those in the transducer tank
outline drawing.
Mounting of transducer tank
Install the transducer tank referring to the hull
unit outline drawings at the back of this
manual.
Note: Locate one of the bolt holes 10° to port
to minimize mechanical shock at the raise/
lower block during pitching and rolling.
Cable gland
Washer
Gasket
Main shaft
(1.17 m)
Welding bead
Welding bead
Figure 1-1 Transducer tank
len
g
th and weldin
g
bead
10°
Figure 1-2
Transducer tank


