36
Operation
The functions of the Interface Module are accessed from the MENU
screen except the Event mark and North mark*.
* —Gyrocompass required.
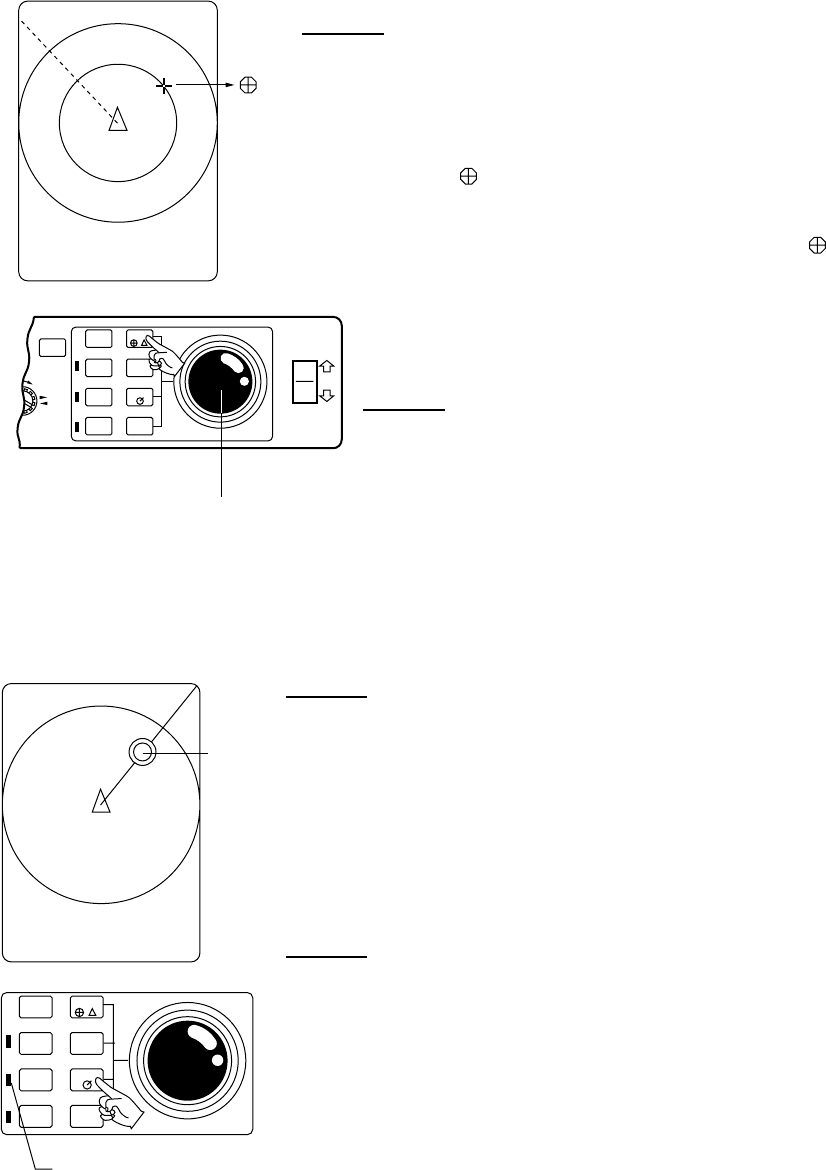
1. Event Mark and Own Ship Mark
Plotting
(1) Move the cursor to the location where you want to plot the
event mark.
(2) Press the EVENT key. The cursor is replaced with the latest
event mark [ ] and the event mark data (horizontal distance,
depth and bearing) appears on the lower left side of the screen.
Note:
1. You can plot 10 event marks. (latest mark - , other 9
marks --- +)
2. You cannot plot the event mark at the own ship mark. In
this case, the own ship mark is plotted (max.10).
Erasing
Locate the cursor on the event mark and press the EVENT
DELETE key.
-
GAIN
AUTO
TILT
SECTOR
SCAN
F1
EVENT
R/B
OFF-
CENTER
F2
EVENT
DELETE
MENU
TILT
+
TRACKBALL
2. Target Lock Mark
Use this mark when you want to track fish echoes automatically.
Target
Lock
Mark
LED lamp
Plotting
(1) Select "TARGET" on the range/bearing item on the SCAN
Menu to activate the mark.
(2) Move the cursor onto the fish echo you want to track.
(3) Press the R/B key. The bearing mark and the target lock mark
appear and start to track the fish echo.
Erasing
To exit from the tracking mode, press the R/B key again.
NOTE:
When using the target (lock) mode the auto tilt and sector
scan controls do not function.
AUTO
TILT
SECTOR
SCAN
F1
EVENT
R/B
OFF-
CENTER
F2
EVENT
DELETE


