


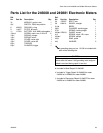
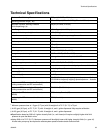

Service
28 309497L
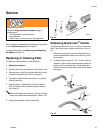
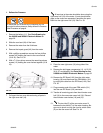
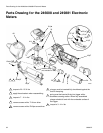
Replacing the Meter Electronics
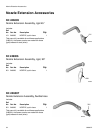
Electronics Repair Kits 246675 for meter 246008 and
249882 for meter 249881 are available for replacing the
Matrix meter electronics. See the Parts List for the
246008 and 249881 Electronic Meters on page 33.
The parts with a † next to their reference numbers are
included in the Electronics Repair Kit.
When repairing the meter using the Electronics Repair
kit be sure to use all of the new parts. To replace the
electronics do the following.
The PSM switch (101) comes attached to the right
meter cover half (18). Do not remove it during the
meter electronics repair procedure.
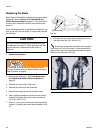
1. Relieve the Pressure.
1. Remove the battery (11). See Parts Drawing for
the 246008 and 249881 Electronic Meters on
page 32.
2. Slide the rear boot (24) off the hose.
3. Remove the meter from the fluid hose.
4. Remove the impact guard (40) from the meter.
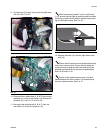
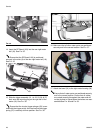
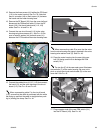
5. With a phillips screwdriver remove the four phillips
screws (42) holding the bezel to the cover halves
(18 & 19). See F
IG. 41.
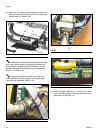
6. With a T-10 torx driver remove the remaining eleven
screws (12) holding the cover halves together (18 &
19).
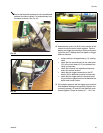
7. Pull apart the two cover halves leaving all parts in
the right cover half (18).
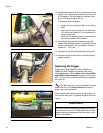
All services to the meter should be done using the
right cover half (18) of the meter. If parts should disen-
gage as the covers are separated, reposition the parts
back into the right cover half (18). See F
IG. 42.
8. Place the new right cover (18) along side of the
meter.
9. Remove the trigger assembly (13, 14, 22, 23, 36, &
37) from the old cover (18) and set aside.
10. Remove the meter housing from the old right cover
(18).
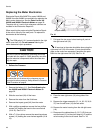
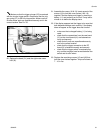
11. Disconnect the cables/wires (A, B, C, & D) that con-
nect the bezel (31) to the circuit board (112) and the
valve housing to the circuit board. See F
IG. 43.
CAUTION
Be sure to use the disposable grounding wrist strap
included with the repair kit. Static electricity can dam-
age the electrical components within the meter dur-
ing the repair.
WARNING
To reduce the risk of serious injury whenever you are
instructed to relieve pressure, always follow the Pressure
Relief Procedure on page 8.
FIG. 41
F
IG. 42
42 (both sides)
12
19
18