


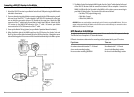

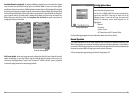

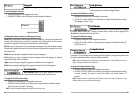

The Menu System
The menu system is divided into easy-to-use menu modules. The main components of the menu
system are:
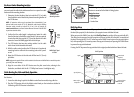
Start-Up Options Menu - Press the MENU key during the power up sequence to view the Start-Up
Options menu.
X-Press
TM
Menu - The X-Press
TM
menu allows you to access the settings
that are changed frequently without having to navigate through the
whole menu system. Press the MENU key once to display the X-Press
TM
Menu. When you select a menu item from the X-Press
TM
menu, the menu
will collapse, leaving only the menu choice on the screen. Use the UP or
DOWN Cursor keys to reactivate the X-Press
TM
menu.
NOTE: The X-Press
TM
Menu choices will vary depending on which view is active
when you press the MENU key, as well as whether you are in Normal or
Advanced User Mode. Either the Sonar or Navigation X-Press
TM
Menu will
appear, depending on the view you are in.
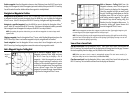
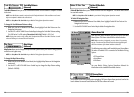
Main Menu Tabs - Less frequently-adjusted menus are grouped into the Main Menu System. The
Main Menu system is organized under the following tab headings to help you find a specific menu
item quickly: Alarms, Sonar, Navigation (if the GPS Receiver is attached), Setup, and Accessories.
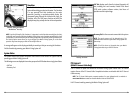
Press the MENU key twice for the Main Menu, then use the 4-WAY Cursor
LEFT or RIGHT key to select a tab, and use the DOWN or UP key to select
a specific menu item under that tab, then use the LEFT or RIGHT keys
again to change a menu setting. Press the EXIT key to move quickly to the
top of the tab. A down arrow at the bottom of a menu means that you
can scroll to additional menu choices using the DOWN Cursor key. A right
or left arrow on a menu choice means that you can use the RIGHT or LEFT
Cursor keys to make changes or to see more information.
NOTE: The Main Menu choices will vary depending on whether you are in
Normal or Advanced User Mode.
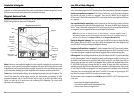
Main Menu System
Normal User Mode
X-Press
TM
Menu
15
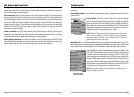
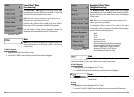
Edit, Delete or Hide Saved Tracks
Display the Tracks Submenu: From any view, press the MENU key twice to display the Main Menu
System, then use the RIGHT Cursor key to select the Navigation tab. Select Tracks and press the RIGHT
Cursor key to display the Tracks submenu.
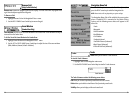
Edit a saved track: From the Tracks submenu, select Edit and press the RIGHT Cursor key to display
the list of saved tracks. Select the track you want to edit and press the RIGHT Cursor key. When the
Edit Track dialog box appears, use the Cursor keys to move between fields. In the Track Name field,
the UP and DOWN Cursor keys change the letter or number. All upper and lower case letters are
available, as well as digits 0-9 and some punctuation characters. You can exit the Track Name field
with the LEFT and RIGHT Cursor keys or by pressing the EXIT key. Select Save and press the RIGHT
Cursor key to save your changes.
Delete a saved track: From the Tracks submenu, select Delete and press the RIGHT Cursor key to
display the list of saved tracks. Select the track you want to delete and press the RIGHT Cursor key.
You will be asked to confirm deletion before the track is actually deleted.
Hide or display a saved track: From the Tracks submenu, select Visibility and press the RIGHT Cursor
key to display the list of saved tracks. Select the track you want to hide or display and use the Cursor
keys to select Hidden or Visible. Press the EXIT key to return to the Tracks submenu.
14