112
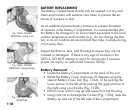
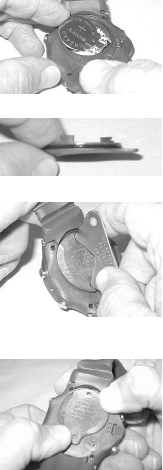
Fig.134-BATTERYINSTALL
Fig.135-COVERO-RING
Battery Installation
• Slide a new 3 volt type CR2430 Lithium Battery, negative
side down into the Battery Compartment. Slide it in from
the left side (Fig. 134) and ensure that it slides under the
contact clip on the lower/right rim of the cavity.
• Lightly lubricate the new Cover O-ring* with silicone grease
and place it on the inner rim of the Battery Cover. Ensure
that it is evenly seated (Fig. 135).
*The O-ring must be a genuine Oceanic part that can be purchased from an
Authorized Oceanic Dealer. Use of any other O-ring will void the warranty.
• Carefully place the Battery Cover (with O-ring) into position
on the rim of the Battery Compartment, then press it evenly
and completely down into place.
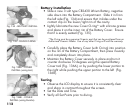
• Maintain the Battery Cover securely in place and turn it
counter clockwise 10 degrees using the special Battery
Cover tool (Fig. 136A), or by pushing the lower portion to
the right while pushing the upper portion to the left (Fig.
136B).
Testing
• Observe the LCD display to ensure it is consistently clear
and sharp in contrast throughout the screen.
• Set the Date and Time.
• Verify all Set Points prior to diving.
Fig.136B-COVER
INSTALL(usingthumbs)
Fig.136A-COVER
INSTALL(usingtool)


