


ENGLISH
16
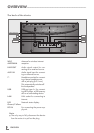
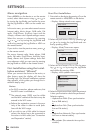
Menu navigation
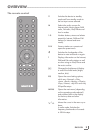
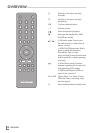
Press »MENU« on the device or on the remote
control, select »Main menu« using » « or » « or
by turning the Jog-Shuttle, and confirm by press-
ing the Jog-Shuttle or »OK« on the remote con-
trol.
In the main menu, you can select several sources
Internet radio, Music player, DAB radio, FM
radio, iPod/iPhone, Auxiliary Input and the
»Sleep«, »Alarms« and »System settings« menus.
Select the sources or submenus by pressing
» « or » « or by turning the Jog-Shuttle and
confirm by pressing the Jog-Shuttle or »OK« on
the remote control.
If you wish to view the previous menu, press » «
on the remote control.
The menus Internet radio, Music player, DAB
radio, FM radio, iPod/iPhone, Auxiliary Input,
Sleep, Alarms and System settings have their
own submenus which you can open by pressing
the Jog-Shuttle or »OK« on the remote control.
First Installation using the instal-
lation assistant “Wizard”
When you connect the device to the mains, or
after factory reset, the display will show the
Grundig logo. The Wizard installation assistant
then appears, which guides you through the in-
stallation step by step.
Notes:
7
For Wi-Fi connection, please make sure, that
the Wi-Fi router is switched on.
7
The network name (SSID) must be visible
and the MAC address of the device may be
entered in the Wi-Fi router.
7
Perform the registration process in the prox-
imity of the router in order to avoid prob-
lems with the Wi-Fi range.
7
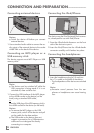
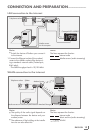
If you wish to use a LAN cable for internet
access, the device has to be connected to
the router via LAN cable (see “Connection
and Preparation” section).
SETTINGS
---------------------------------------------------------------------------------------------------------------------------------------
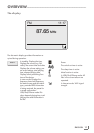
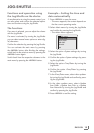
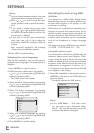
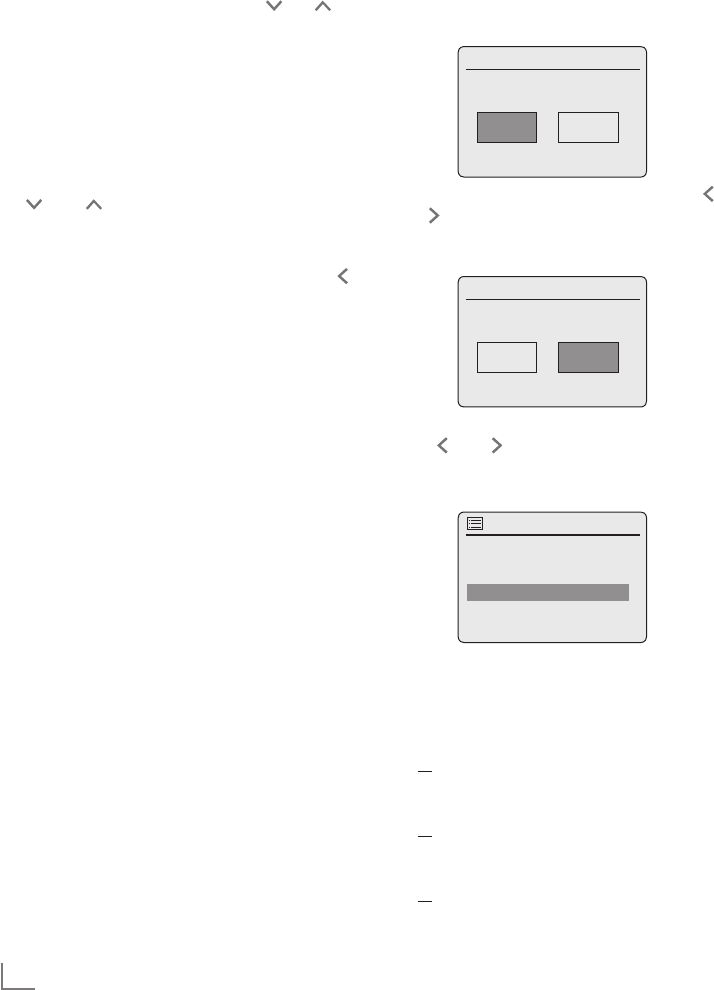
Start First Installation
1 First switch on the device by pressing »8« on the
remote control or »ON/OFF« on the device.
– Display: »Setup wizard« menu opens.
Time/Date
Setup wizard
YES NO
Start now?
2 Select the push button »YES« by pressing » «
or » « or by turning the Jog-Shuttle and con-
firm by pressing »OK«.
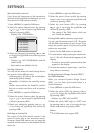
– Display: »Date/Time« menu opens.
Time/Date
Date/Time
12 24#
12/24 hour format
3 Select the hour format »12« or »24« by press-
ing » « or » « or by turning the Jog-Shuttle
and confirm by pressing »OK«.
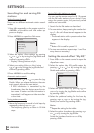
– Display: »Auto update« menu opens.
Time/Date
Auto update
Update from Network
Update from FM
Update from DAB
No update
4 Select the input source from which the automat-
ic time synchronisation should be performed.
Selection options:
– »Update from DAB« (Time synchronisation
from a DAB station);
or
– »Update from FM« (Time synchronisation
from an FM station);
or
– »Update from Network« (Time synchronisa-
tion from an Internet station),
or
– »No update« (No automatic time synchro-
nisation).